Sunday, December 31, 2017

Lessons from Christmas 2017

At From Bolt to Beauty world headquarters, Christmas 2017 lingers. The tree is still up and decorated. Toys litter the living room floor. It’s an appropriate time to look back at the events of the past month—the holiday fairs and parties and shopping—and admit it: I botched it all up! I thought I took on a manageable number of holiday activities, but I ended up committing myself to too much.

Case in point: two Christmas tree quilts. I was so proud of myself, back in November, when I came to the realization I wouldn’t have time to quilt either of them before Christmas. I sent both projects off to a longarmer, which meant I was on the hook for binding only. Bind them I did—finally!—on December 23.

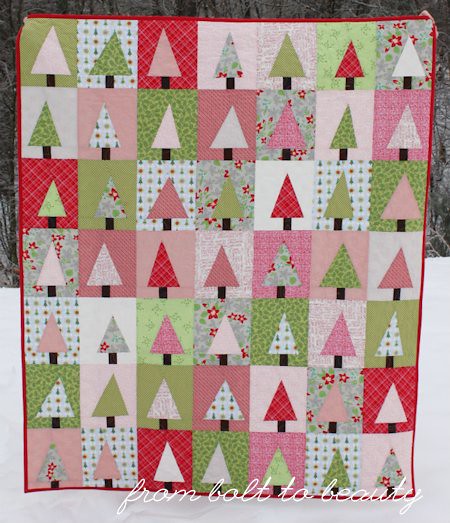
The first quilt is for my family to keep. I used it to chip away at my red and green stash, buying just a little yardage to flesh out the fabric pull.


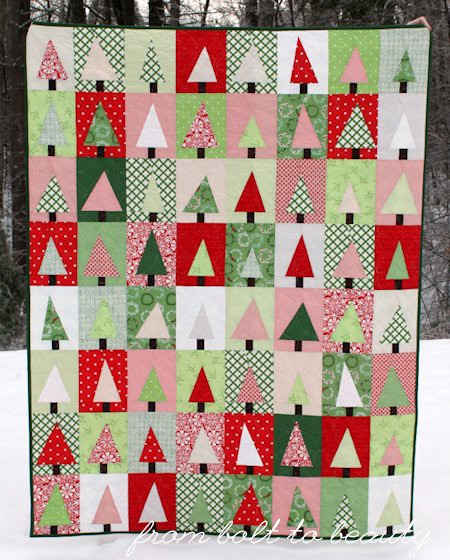
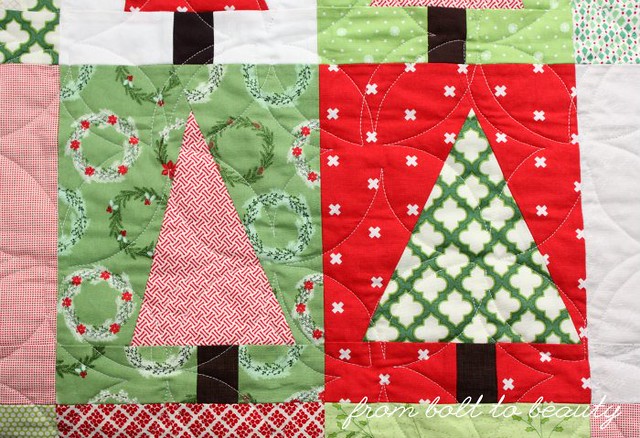
The beauty of this tree block, designed by Amy Smart of Diary of a Quilter, is that it works with small-scale prints as well as large ones. Before this project, I had no idea what to do with the green and white Trellis print from Heather Bailey’s Up Parasol collection (pictured in tree on right, below), but it works perfectly here. I love how it reads as a lower-volume green without being a light green.


This quilt reminds me that I can veer from my palette on the back of a quilt. The main print on the back, from Anna Maria Horner’s Field Study line, wouldn’t have worked on the quilt top. It has too much cream in it (I used mostly white on the front), and the green is too different. Paired with the three leftover tree blocks and the same cherry red used on the top, however, the AMH print allows the back to both work well in its own right and complement the design on the other side.


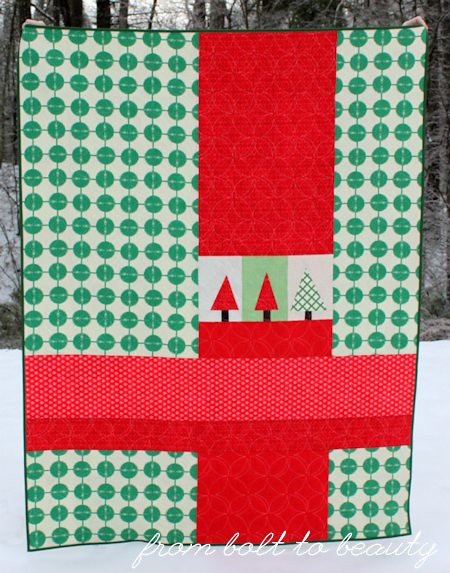
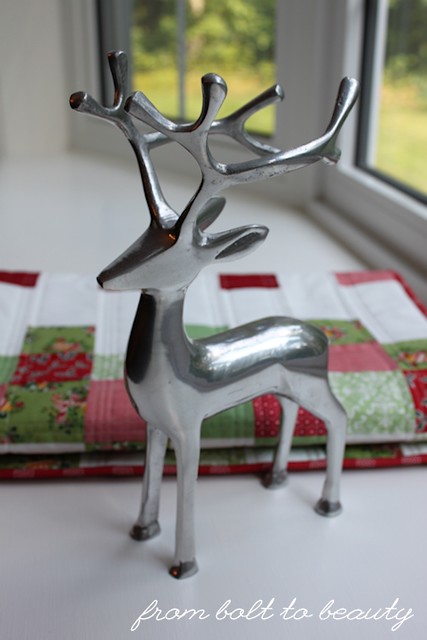
The quilting, done by Lisa Teichmann of Garden Gate Quilting, is perfect for this project. The easy-breezy orange peels look ornament-like against the Christmas-tree backdrop.


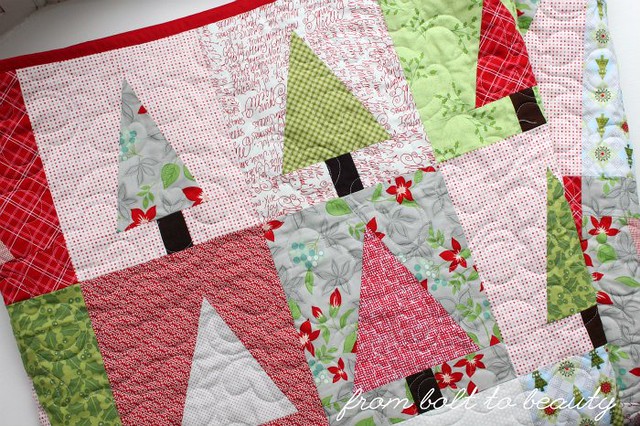
After finishing piecing the first Christmas tree quilt, I moved on to a second! Whereas the first one focused on cherry reds and grassy greens, the second incorporated pinker reds and yellow-greens. (I get a kick out of seeing the same design rendered in different palettes like that.)


The Bonnie and Camille print from April Showers inspired the palette. It’s not a Christmas fabric, but the red flowers remind me of poinsettias and I like the gray it introduces into the palette.


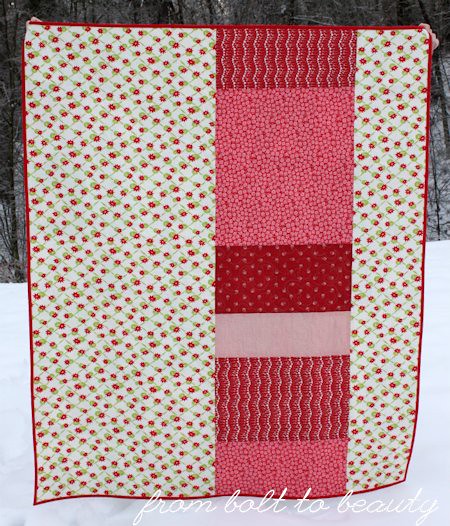
The back features more Bonnie and Camille. As with most of my quilt backs, I cut a length of fabric vertically and filled it out with a columns of scraps to make a back that would accommodate the size of the top. (More on that approach to piecing backs can be found under the Techniques tab.)


Christmas 2017 was a happy one. We were all healthy, so all of our plans (mostly) went off without a hitch. But binding quilts two days before the holiday was for the birds. If it weren’t for all the other stuff I was doing—the quilted ornaments and belated-birthday sewing and guild commitments—two binding projects would have been doable. Let’s hope I can hold on to these lessons for the next 12 months and make the holiday season of 2018 saner!

How did you hold up over the holidays? Were you crafting at the 11th hour?!

Linking up to Finish It Up Friday, Main Crush Monday, Let’s Bee Social, and Needle and Thread Thursday ...

Follow on Bloglovin

Monday, December 18, 2017

What to Do with a Mini-Charm Pack

I am a lover of precuts—jelly rolls, charm packs, and layer cakes all have their place in my stash and in my heart. I like having a cross-section of certain fabric collections, and buying precuts is less expensive than investing in fat quarters or yardage of an entire line.

Each kind of precut has its advantages and disadvantages, but I think mini-charm packs—sets of 2.5-inch squares—are the least practical. There’s only so much you can do with those tiny pieces of fabric. When I received a mini-charm pack of Kate Spain’s Voyage at my guild’s fall retreat, courtesy of Moda Fabrics, I knew I would have to put those squares to good use right away, lest they wither away unused in my stash, so I challenged the other retreat-goers to sew something with their packs and present their creations at the December guild meeting.

I decided to make an En Pointe Bag, from Kairle Oak’s tutorial on Moda Bake Shop, which proved to be a cute bag and enjoyable sew.

The colors in Voyage are gorgeous!

Everything for this project came from my stash, including the Essex Linen exterior, Lotta Jansdotter lining, and Denyse Schmidt binding.

The interior of the En Pointe Bag features a single pocket.


A binding along the top gives the bag a clean finish. No turning required!

Note to my future self: If you make this pattern again, remember you veered from the instructions a bit. That is, you interfaced the patchwork panel, pressing it lightly with your iron just enough that the interfacing would fuse. This technique worked well and gave the final project the body you were looking for!

The bag is interfaced, which gives it great structure.

The other participants in the challenge came up with different project ideas. One person made a reversible bracelet. Another designed some baskets. Others made everything from potholders to mini-quilts. It was fun to see how we each took the same little bundle of squares in our own direction.

If you are the owner of an unused mini-charm pack, I ventured into the From Bolt to Beauty archives to find other projects you could tackle with your precuts.

Earlier this year, I made ornaments from a mini-charm pack of Basic Grey’s Juniper Berry ...


And back in 2015, I followed a free pattern from the Fat Quarter Shop to make this runner. (The instructions call for mini-charm packs, but you need so many of them that cutting up a charm pack will yield all the printed squares you need for the runner size. I used scraps for my version.)


Do you have other recommendations for using up a mini-charm pack? It’s only a matter of time before I have another in my stash!


Follow on Bloglovin

Friday, December 8, 2017

Run, Run Rudolph!

After Thanksgiving wrapped up, I made note of four crafty Christmas-related tasks I wanted to take care of before the big day:
  1. Bind two Christmas tree quilts
     
  2. Label and ship a baby blanket to a friend
     
  3. Make a dozen ornaments for the school holiday store
     
  4. Sew and cross-stitch an annoying Christmas stocking, the trauma of which may push me to (a) hit the egg nog hard, (b) watch It’s a Wonderful Life on a loop, and/or (c) curl up in fetal position until December 26
I have yet to start any of the first three projects, but I’m happy to announce that the blasted Christmas stocking is finished and about to be shipped to the recipient.


Sure, the finished stocking is super cute and looks simple enough. Sewing the outer stocking, lining, and cuff together, however, is a hassle. (Full disclosure: I drafted the pattern pieces myself and volunteered to make this stocking, so I’m really not in a position to gripe.) This is the fifth such stocking I have made over the years. I’m thinking it will be my last!

If you want to tackle another handmade gift, I do know of some last-minute, non-stocking projects you could bang out in these last weeks leading up to Christmas. I’ve test-run all of these designs, and they’re available for free here on my blog or elsewhere. I’ve categorized them, to the best of my recollection, by how much time they require. Good luck!

Less Than an Hour

Pixie Basket (Fabric Mutt): As long as you don’t make them by the dozen, as I have, these tiny bins are quick sews. And they’re fun to fill and gift.


Gift Bag for Beer Lovers (From Bolt to Beauty): Two dollars, some pearl cotton, and a half hour is all you need to make this six-pack holder.


About an Afternoon

Library Totes (Sweet Jane’s Quilting & Design): These bags require more time, but they’re beauties—and a great way to use up random jelly-roll strips.


Boxy Lined Pouches (Pink Stitches): I sewed this pattern as a makeup bag, but it could just as easily be a pencil case, project bag, or gift bag.   


Closer to a Weekend

The Tree Is Trimmed (From Bolt to Beauty): I designed this wall hanging years ago, and the recipients still display it each year.


Cargo Duffle Bag (Noodlehead): This tutorial comes from Anna Graham, my favorite bag designer. This project isn’t for the faint of heart, but a walking foot will make the process easier.


Do you have a stocking story in your closet, something that wasn’t impossible but more work than you care to do again? Let us know in the comments ...

Linking up to Finish It Up Friday, Main Crush Monday, Let’s Bee Social, and Needle and Thread Thursday ...

Follow on Bloglovin