Showing posts with label books. Show all posts

Wednesday, August 2, 2023

Just Two Charm Pack Quilts: Snapdragon Cove / Beauties Pageant 225

Hello! And welcome to my stop on the Just Two Charm Pack Quilts blog hop!

When I learned that Cheryl Brickey was working on a third pattern book, I was more than a little excited. I’ve made projects from her previous two books—Modern Plus Sign Quilts, cowritten with Paige Alexander, and Just One Charm Pack Quilts—and have come to regard Cheryl as a quilter whose designs are unique and elegant in their simplicity. Plus, she brings an engineer’s sensibility to the table: Her patterns are solidly written and a joy to follow.

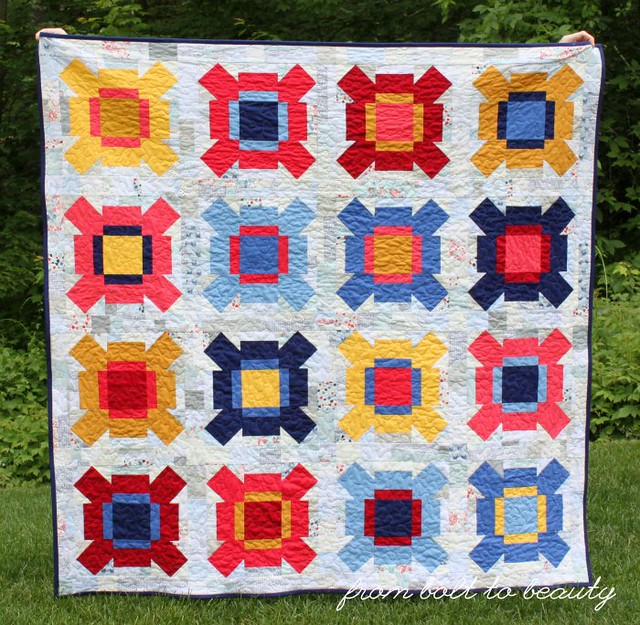
When the latest release, Just Two Charm Pack Quilts, hit my desk, I quickly homed in on Snapdragon Cove as the first project to tackle. It’s deceptively simple ... All it requires is 80 charm squares and some supporting yardage to make this lovely collection of diamonds on point.

The Fabric

This project was the opportunity I was waiting for to justify buying a fat quarter bundle of Eden, by Gabrielle Neil for Riley Blake. You read that right: I cut up fat quarters to sew something from a Just Two Charm Pack Quilts! It’s not against the rules, promise! Cheryl’s book starts with an exploration of charm packs—how to augment a pack you already have on hand, how to track down a long out-of-print collection, and how to cut up other precuts for use with this book.

Because I’m trying to be kinder to my body (see my post about quilting ergonomics here), I sent those fat quarters through my Accuquilt Go! with a half-square triangle (HST) die to prepare for this project. The upside to this approach is that I didn’t have to trim a single HST and that I have plenty of Eden left over for future quilty endeavors.

The Quilting

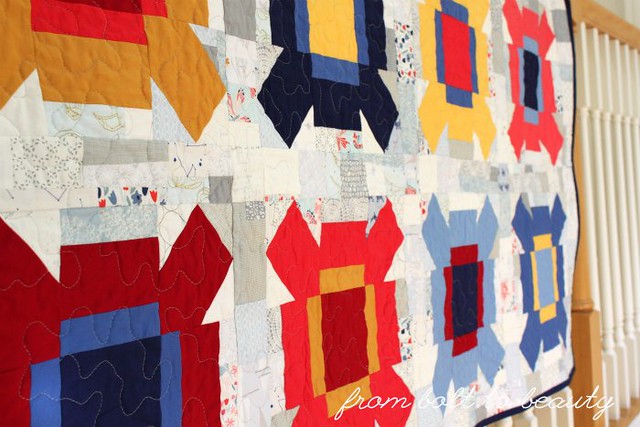
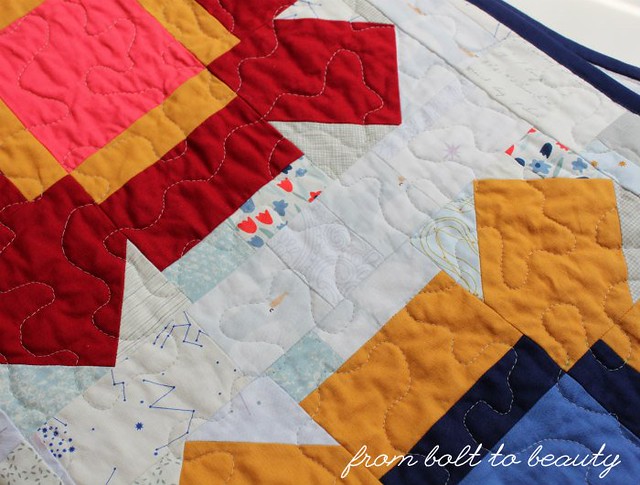
To soften Snapdragon Cove’s lines, I asked my friend Ophelia Chang to quilt a swirly flower pantograph on the finished top. I love how the quilting is invisible on the Kona Bone chunks and pops on Cornflower, from Ruby and Bee.

The Binding

I bound the quilt with Bella Solid in Shocking Pink and the hot pink print from Eden. This was not a design decision; I didn’t have enough Shocking Pink. Still, the duo work together to bring a little oomph to the finished project, and I think all that pink kind of makes the quilt. Even the orange or goldenrod wouldn’t be enough to counteract all that blue.

More on the Book

I can’t say enough about the collection of 16 throw-size projects in Just Two Charm Pack Quilts. Usually, I’ll consider buying a quilt book that contains 3 or 4 quilts I’d like to make. I would easily consider making half of the projects in Cheryl’s book. Maybe that’s the highest compliment I have to give!

I highly recommend you check out the other blog hop participants to see what I mean. I am swooning over Tish’s Star Rays quilts, Selwyn’s Morning Flower Patch quilt, and Anja’s Process Flow quilt. For other stops on the blog hop, head to Cheryl’s blog, Meadow Mist Designs.

A Giveaway!

** Congratulations to Donna W, the winner of the digital version of Cheryl’s book! Donna, your prize will be coming directly from Cheryl—enjoy! **

To celebrate the release of Just Two Charm Pack Quilts, I am giving away a digital copy of the book!

You have two opportunities to enter to win the digital book: (1) Upload your link to the Beauties Pageant below (just one link, please) and/or (2) leave a comment on this post.

This giveaway is open to everyone everywhere through 11:59 p.m. Eastern Daylight Time (GMT-4) on Sunday, August 13, 2023. 

IMPORTANT: If you’re a no-reply blogger or comment anonymously, please include your email address in your comment or send it to me at frombolttobeauty (at) gmail (dot) com—otherwise, I have no way to send you the digital book. And if you’re not sure whether you’re a no-reply blogger, send me your email address just in case.

Good luck!

Taking a Break 

I need to step away from my blog for the next few weeks as I wrap up the summer with family fun. I’ll be back on Friday, August 25, September 1 with a new post and Beauties Pageant linky. Until then, happy sewing!

Linking up to My Favorite Finish at Meadow Mist Designs ...

Follow Me On ...


* * *


The pageant rules are simple:
  • Post your finish in the linky tool. (No links to your own giveaway or linky, please!)
  • Point your readers back here with a text link or use the button above.
  • Visit and comment on other participants’ finishes.

You are invited to the Inlinkz link party!

Click here to enter

Wednesday, June 21, 2023

Perfectly Pieced Quilt Backs Book Review / Beauties Pageant 221

I am no stranger to pieced quilt backs. I find that they’re a great way to use up yardage, fat quarters, and orphan blocks. After I had completed the top to my second Plaid-ish quilt, however, I knew something a little more special than my usual pieced back was called for.

The front of this Plaid-ish is busy. (See what I mean here. I tried to count how many different prints it showcases but gave up once I hit 50!) The back, then, merited something simpler—a creation that was would complement, and not compete with, the top.

For this task, I turned to Kelly Young’s most recent book: Perfectly Pieced Quilt Tops.* You may already know Kelly from her blog, My Quilt Infatuation, and her previous two books, both of which feature patterns and techniques for improv quilting. Perfectly Pieced Quilt Tops is something altogether different. It offers instructions for 30 different quilt backs, and its designs run the gamut from those that bust through tiny scraps to those that incorporate large cuts of yardage—and everything in between.

Because I had so many smaller bits leftover from piecing Plaid-ish, I chose to follow the instructions for Every Little Bit, a design that creates a vertical swath of improvisationally pieced fabrics. Every Little Bit took more time than my usual quilt back, but it wasn’t a big time commitment, either. I chose to sew my column of improv slowly over a week when I needed breaks from all the computer work I had to do. In the end, I can say I enjoyed the process and am in love with the results.

Even though I am a seasoned quilt-back piecer, there is a place for Perfectly Pieced Quilt Tops in my library. I may not need its inspiration tomorrow or next week or next month, but I am glad to have it at the ready for those times when I feel stuck with the quilt back at hand.

And there’s a lot to like about this book. I’m a fan of how the patterns are organized, separating the designs that require small scraps from those that reply on larger cuts of yardage. I also like how each of the 30 designs is accompanied by instructions for three different sizes: lap, twin XL, and queen. The next quilt I make may not fall neatly into one of those categories, but the fabric requirements and sewing instructions provide a good place for me to start.

If you’re new to quilting, this book will check off even more boxes. Kelly makes a good point that these backs themselves are interesting and engaging enough to serve as a quilt top, and she supplements her pattern collection with basic information about building a quilt sandwich and finishing your beauty.

I have to share one more important point: The book comes with patterns for the 18 quilt *tops* peppered throughout its photographs. These patterns are all for lap-size quilts and are downloadable (they’re not contained in the book). In my mind, this is not a bonus—it’s a whole other book!

Perfectly Pieced Quilt Tops is available at all the standard book retailers. For a signed copy, go to Kelly’s Etsy shop.

To see what I made from Kelly’s first two books, visit this post and this post.

A small army of bloggers have created something from Kelly’s book. Check out their perfectly pieced backs ...

Sandra @ mmm...quilts


Vasudha @ Storied Quilts


* I’ve been reading My Quilt Infatuation for 10 years. I checked out this book because I think Kelly is a talented quilter and designer, and because I enjoyed her previous two books. I will not profit from any purchases of her book made from this post, and this review is my own opinion.

Follow Me On ...


* * *


The pageant rules are simple:
  • Post your finish in the linky tool. (No links to your own giveaway or linky, please!)
  • Point your readers back here with a text link or use the button above.
  • Visit and comment on other participants’ finishes.

You are invited to the Inlinkz link party!

Click here to enter

Friday, June 21, 2019

Giveaway: Camille Roskelley Book / Beauties Pageant 37

We’re a week into school vacation up here in Massachusetts, and I’ve come to terms with the fact that this is going to be the Summer of Quilt Tops. I need sewing that requires little brain power, projects that I can pick up and put down easily. Of course, out of necessity, the Fall of Quilting will have to follow the Summer of Quilt Tops, but I can live with that.

I just added Camille Roskelley’s Little Man pattern, from her Simplify book, to my Summer of Quilt Tops to-do list. It’s a quilt I’ve made twice before, once in a contrasting blue and orange palette ...


And again in a more subdued palette ...


The beauty of this pattern is that the blocks don’t require much fabric—I made the first two versions with mere scraps of novelty prints I had stubbornly held on to. Plus, the final product is about 40 inches by 51 inches—I prefer gifting generously sized baby quilts.

My third Little Man quilt will be more of a Little Lady quilt, featuring Seaside Carnival, a collection by Rae Ritchie for Dear Stella. There is no intended recipient for this quilt yet, but since it’s the Summer of Quilt Tops, I don’t think that matters. Let the unquilted tops pile up!

A Giveaway

If you want to make your own Little Man quilt, you’re in luck: I have a copy of Simplify to give away. Just comment below to be entered to win. (If a prompt would be helpful, let us know whether there’s a quilt pattern you find yourself making again and again. What’s so great about it?)


The giveaway is open to U.S. recipients only. (To those of you in Canada, Germany, and beyond, you know this pains me, but the cost of shipping internationally would exceed the value of the book.) The random-number generator will pick a winner on Friday, June 28. If you’re a no-reply blogger, please drop me a note at frombolttobeauty (at) gmail (dot) com with your email address in case you win.

Update: Kathy S. is the winner!

This Week’s Pageant


The pageant rules are simple:
  • Post your finish in the linky tool. (No links to your own giveaway or linky, please!)
  • Point your readers back here with a text link or use the button above.
  • Visit and comment on other participants’ finishes.


You are invited to the Inlinkz link party!
Click here to enter
Follow on Bloglovin

Monday, June 11, 2018

You, Too, Can Sew Improv!

Bloom Chicka Boom, my first improv quilt.

There was a time in the not-too-distant past when I thought improv was a magical kind of quilt making. It was beyond my skill set and best left to the masters—Victoria Findlay Wolfe, Sherri Lynn Wood, and other sewists known professionally by three names. At that point in my sewing career, creating without a concrete plan seemed hard and inefficient. How did I know whether I was going to like my finished product? The idea of wasting my time and fabric on a project that I might not love was unappealing.

But I have grown, friends. I’ve learned that improv doesn’t mean sewing without a plan. It doesn’t mean you start piecing fabric, willy-nilly, and end up with a fabulous finished quilt. You might not be following a pattern per se, but you do sew within a framework, the rules by which you select fabrics, cut them up, and sew them back together. I can say all of this with confidence because I just completed my first quilt with lots of improv sewing. : )

The difference for me was the instructions set out in Stash Statement, a new book by Kelly Young, of My Quilt Infatuation. Kelly approached me a few months ago about participating in a blog hop for her book, and I agreed to it with some hesitation. I am happy to report, however, that Stash Statement has helped me conquer my fear of improv, and it has the potential do the same for you, too!

Still skeptical? Let me address your likely concerns ...

It Seems Hard

Creating your first improv quilt can seem daunting, but having a framework makes the task manageable. And that is exactly what Stash Statement provides. Following Kelly’s advice, you learn how to sew improv panels, blocks, or strips and incorporate them into patterns. In other words, Stash Statement marries what’s scary and new (improv) with what you already know and love (bold, modern patterns).

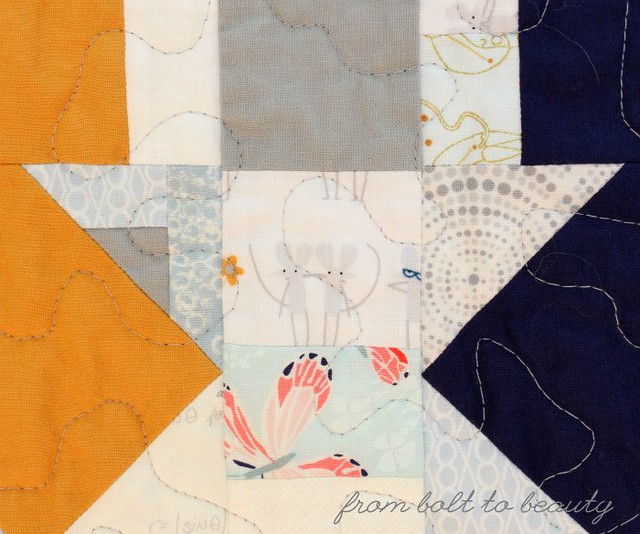
Bulldogs, curlicues, flowers, ducks ... this background has it all!

Sometimes the improv panels you make will appear in the foreground of the quilt top. In the quilt I made, Kelly’s Bloom Chicka Boom pattern, the improv is in the background. For me, this was extra fun because I got to use up a chunk of fabric in cool shades of gray, blue, and periwinkle, not my typical palette. (See my first post about this project here.)

The variety in the background prints creates great texture.

I Don’t Have a Big Scrap Bin

When I first received Kelly’s book, I had just given away the majority of my scraps. Lucky for me, Kelly addresses using yardage in improv piecing. You’d never know that almost all of my low-volume fabric choices came from yardage in my stash. There’s such a great spectrum of fabrics, including many novelties that were aging in my fabric drawers for years. It felt good to get those beauties out of my stash and into a project.

I spy Lizzy House’s constellation prints from her Whisper Palette.

It Seems Time Consuming

Some of the patterns in Stash Statement are more time intensive than others. Bloom Chicka Boom, with all that improv in the background, is probably one of the more time-consuming ones. I started well in advance of today’s deadline, sewing my improv panels here and there when I wanted something fun and relaxing to sew. If you’re looking for a faster project, choose a different design, maybe one that features the improv in the foreground. Check out Beach Retreat, for instance. I think that would go together a lot faster. (In fact, I think I’ll be making a rainbow-y version in the future!)

Something to keep in mind is that you don’t have to be super legalistic about this process. After all, it is supposed to be a fun opportunity to use what you have on hand. Bloom Chicka Boom calls for sewing improv panels and then cutting them down into smaller sizes for use in the blocks. When I found a stack of low-volume 2.5" squares in my stash, I could have sewn them into panels and then cut them back into 2.5" squares, but I used them as is and they look great in the quilt.

The Bloom Chicka Boom block also calls for 1.5" by 4.5" strips. Since I was cutting from yardage anyway, I simply cut 1.5" strips of varying lengths, sewed the short ends together, and then cut them into the needed 4.5" lengths. You would never know by looking at my finished quilt that I took a shortcut.

I love these chummy little mice!

There Are So Many Seams

Your finished improv quilt top may have some spots where the seams are bulky. I didn’t want to quilt not-so-straight lines through any bulky areas, so I chose to free-motion quilt my project. Granted, I didn’t know how to free-motion quilt at the time I made this decision, but I thought it would be more forgiving. In the end I figured out how to FMQ, and it worked well for me with this project.

The one issue I did not foresee is how the bulk would affect my binding. I machine-finish my bindings, and I wish I had given myself more wiggle room than I usually do to compensate for that extra bulk at spots along the edge of the quilt.

If you have sewn something improvisationally, how did it go? If you’re new to improv, are there other concerns that are preventing you from making the leap?

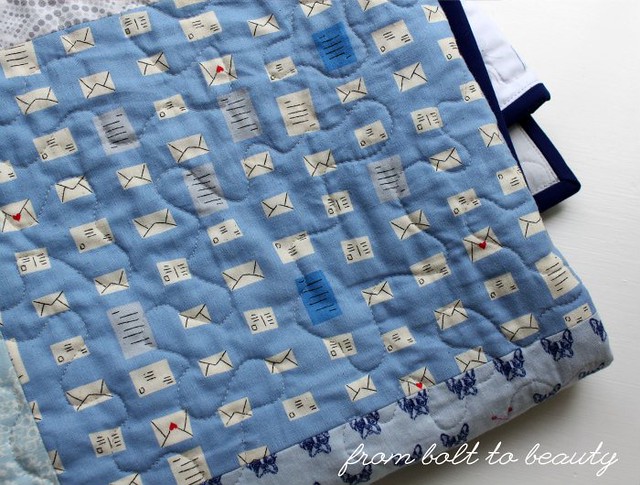
The back features prints in the same palette as my improv background.


Now that I’ve covered improv, I need to tell you all about my adventures with FMQ! Stay tuned for a future post on that subject.

Linking up to Let’s Bee Social and Needle and Thread Thursday ...

Follow on Bloglovin

Wednesday, July 1, 2015

Break-the-Rules Improv Piecing

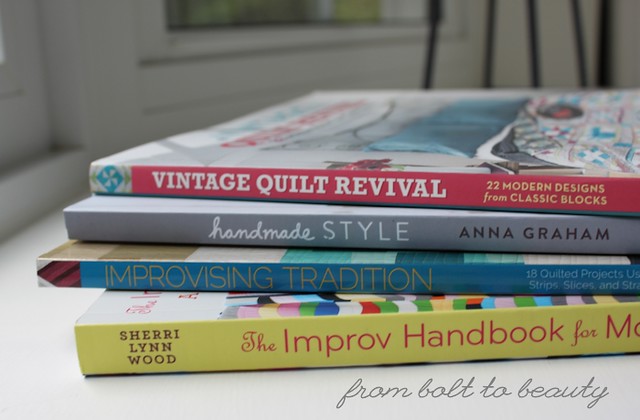
In the past few months, I’ve added to my quilting library with some notable titles. I wish I could say that I’ve finished—or even started!—projects from all of these books. I have many craft books, however, that I’ve never made projects out of. They serve more as reference and inspiration than sources of patterns.


The exception is Sherri Lynn Wood’s Improv Handbook for Modern Quilters. Purchasing that volume coincided with attending a workshop, hosted by my guild and led by the author. I went into that daylong event presuming that improvisation wasn’t my thing. The most I had pieced improvisationally was a few projects from the Stitched in Color Curves Class I took earlier this year, and although I liked the results, I still preferred the predictability of patterns. Plus, I didn’t know much about Sherri Lynn Wood or her work. I figured I’d gain some techniques that I could incorporate into my quilt making, but I doubted that the sewing I did in the workshop itself would result in a quilt. I was wrong.

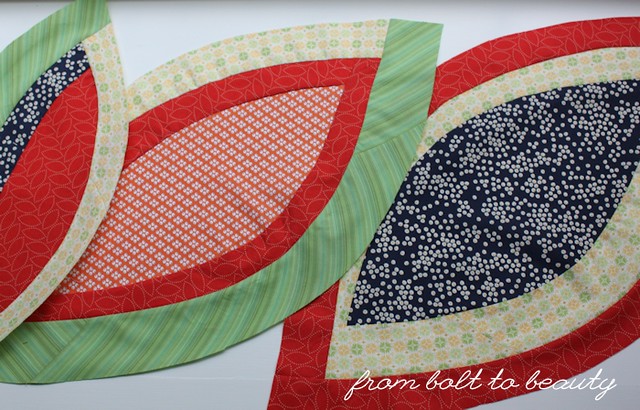
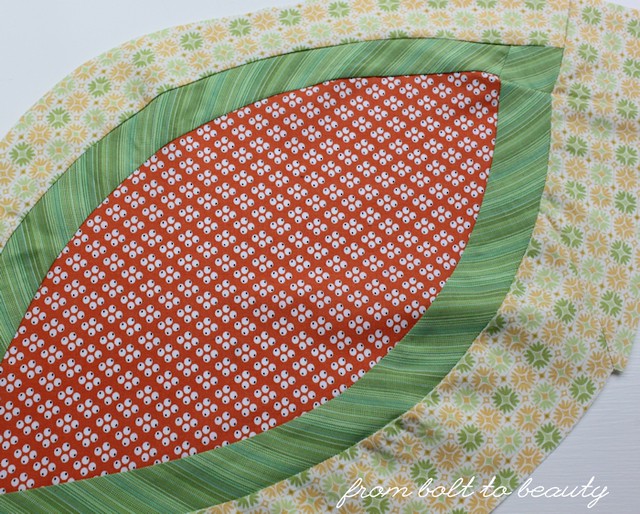
The workshop explored bias-strip piecing. We started with big fabric petals (like 18 inches long!) and proceeded to add layers of bias strips to them. Along the way, we addressed all the unforeseen puckers and curling and general wonkiness that arose when sewing with those shapes.

By the end of the day, I was hooked. Working with the petal shapes opened new doors for me. I had been thinking a lot about movement since I saw my friend Kim’s Exodus quilt. I think the petal shape in itself evokes a sense of movement, and I can’t wait to see where the project with these petals ultimately takes me.

Three of the four petals I made at the workshop.
The far-right petal is 26 inches long!

What was perhaps the most striking part of the workshop, and something that Sherri touches on in her book as well, is the process of creating improvisationally. Most of my quilting is done in bits and pieces between breaking up my boys’ WWF matches and feeding/chasing after/carting around my aspiring wrestlers. Sherri, however, encouraged us to be present in the moment in a way I’m usually not. Often my hands are sewing, but my mind is focused elsewhere. She suggested methods to center ourselves, to constrain our creative process (with, for example, self-imposed limits on the time at task or on our fabric resources), and to make the most of our time with improv techniques. I’m notorious for skipping the intros in quilting books and heading straight to the quilts themselves, but I recommend the opening pages of The Improv Handbook for Modern Quilters that address these issues of creating improvisationally.

During the workshop, Sherri also showed us ways to break the rules to get the results we wanted. After years of striving for consistent quarter-inch seams and perfectly pressed quilt blocks, I found myself stretching fabric (on purpose!), pruning away parts of the fabric I had just pieced, and in general, celebrating the places my so-called mistakes took me as a quilt maker.

Can you see some of my creative sewing solutions here?
I inserted pleats to flatten the fabric.

Where do you stand on the subject of improvisation in quilts? Have you dipped your toes in the improv waters or already jumped off the diving board into the deep end? (I’d understand if you were still sitting under an umbrella working on a drink. It’s a comfortable place to be.)

Linking up to Let’s Bee Social, Needle and Thread Thursday, Sew Cute Tuesday, and WIP Wednesday ...

Follow on Bloglovin

Wednesday, September 3, 2014

Amy Butler’s Cosmo Bag

She’s done! If you follow me on Instagram, you know that I’ve been working on an Amy Butler bag. This is one of the projects I selected as part of Stitched in Color’s effort to use those overlooked and neglected fabrics in our stashes.


Case in point: two amazing Amy Butler fabrics—both from her Love line—that I have had for a long time. I purchased the purple fabric during my wraparound skirt phase, so I had more than 2 yards of it. (Somehow during that phase, I ended up with one wraparound skirt, and my sister ended up with three. I’m still not sure how that happened.) I found the red paisley in the $5-a-yard sale section at my local quilt shop.

 
I’ve been meaning to tackle one of the bigger bags in Amy Butler’s Style Stitches (given to me by my sister a few Christmases ago, which kind of makes up for the fact that I cranked out so many wraparound skirts for her). The Cosmo Bag is huge. It’s 21 inches wide and almost 23 inches tall, the perfect dimensions for, say, toting a finished quilt to show-and-tell at guild meetings.

As usual with Amy’s patterns, this one was clearly written. It was categorized as an “easy” pattern. I haven’t done any of the other bags in the book to compare the Cosmo pattern to, but it was a bigger project than I had bargained for. I cut out 30 pieces from quilting cottons and 27 pieces of interfacing. I spent an entire week of crafting time on it. And there were multiple times I had to, as Cheryl Brickey of Meadow Mist Designs noted, “pin it into submission.” (Did you catch that, Chelsea? Pins are you friends!)

Was it worth it? Completely. I’m thrilled that these fabrics have been put to good use. And the experience was a great confidence booster for me. When I was a new sewer, ten-plus years ago, I tried my hand at some of Amy’s designs, and they were a challenge. Although the Cosmo Bag took longer than I anticipated, I absolutely have the skills to pull it off. My mom, who has been sewing longer than I’ve been alive, witnessed my construction of the bag and admitted that there was no way she’d attempt a pattern like that. It would drive her crazy. Go me!

BTW: If you’re considering making your own Cosmo bag and, like me, have an early printing of Style Stitches, be sure to check out Amy’s update about the pattern. (Printings since May 2011 reflect these changes.) Also: You can still find fabrics from her Love line at some fabric retailers, like Hawthorne Threads.

Two questions for you in conclusion ...

What are your experiences with Amy’s bag patterns? I’m looking to do the Reversible Everyday Shopper (below), also from Style Stitches, next. I’m considering the Weekender Travel Bag sometime down the road (like, sometime in 2015!).

Photograph from Amy Butler’s Style Stitches.
Used by permission of David Butler.

And on a completely different subject ... Chelsea, of Patch the Giraffe, and I have talked about the possibility of a low-volume fabric swap. If you’re interested, leave me a comment.

Linking up to Sew Cute Tuesday (check it out—I was the guest blogger this week!), Let’s Bee Social, and Needle and Thread Thursday. I’m also joining in the fun at TGIFF and Finish It Up Friday ...

Oh, and I heard about all the fun happening at Craft Buds Craft Book Month. How could I say no to that?!

Wednesday, July 16, 2014

Zigs and Zags

I am happy to report that my version of Denyse Schmidt’s Big Zig is done. It has been pieced. It has been basted. It has been quilted and bound. I can only say: thank heavens!


If you’ve been keeping tabs on my progress, you know that this Big Zig withered away in my closet for too many months, just hoping to be a real quilt one day. With my brother-in-law’s half-birthday looming (you read that right: this puppy was six months late), it was time to indulge in a little binge sewing and wrap things up.

I’m so darn pleased with it. I thought that there would be little forgiveness in the chunky geometric chevron and the many zigs and zags that constitute the quilting. I was wrong.

I began the piecing in 2013. Sure, it was a different year, but also, I was a different quilter. I’ve learned so much, and I suspect if I had done the piecing in one fell swoop (either then or now), the math would have worked out a little better. For example, I was drawing some guidelines through the crests and valleys of the chevron to mark quilting lines. Two zigs that were adjacent vertically were off by a quarter of an inch. That is an order of magnitude to a quilter. For whatever reason—I can’t explain it and I’m trying not to overthink it—both the quilting and the project overall came out really well despite such inaccuracies.

Then there was the happy accident of the back. I bought many yards of Carolyn Friedlander’s Botanics to make the back and then realized (duh!) it has a vertically oriented design and my calculations were based upon using it horizontally. (How many years and years do I have to sew before I stop making rookie mistakes?!) That, however, inspired the back my dear Big Zig now sports. Like its brother, the quilt front, the back is geometric and chunky. I quilted in thread that matches the front—some navy, some gray—which allows it to blend in nicely on that side. The back, on the other hand, shows peeks of the quilting here and there, hiding it in other spots. Super happy with it.


I’m sure many of you have a copy of Denyse Schmidt Quilts: 30 Colorful Quilt and Patchwork Projects, the book where the Big Zig pattern appears. It’s a classic. As long as you don’t stop midproject to make another three or four quilts as I did (!), it’s a pretty quick sew. I love how Denyse was tuned in to chevrons before chevrons were trendy and how, with different fabric and thread choices, one sewist can create a guy quilt and another can take the same pattern and make something distinctly feminine. Even after making my own, I still covet the original ...

Photograph used by permission of DS Quilts
Linking up to My Quilt Infatuation and Finish It Up Friday!

Update: I just joined in the fun at Blossom Heart Quilts!

Tuesday, July 8, 2014

Procrastination, Quilting for Dudes

I was recently over at 13 Spools, joining in the conversation about works in progress. How many should a sewer have going at once? Is every idea one worth pursuing?

It’s necessary for me to have more than one ball in the air at a time. I need the variety for those moments when I get bored with a project. Sometimes, I need a quick finish (and let’s face it: quilts are never quick finishes!) so that I can revel in that sense of accomplishment and propel myself into a more daunting project. Then there are those times I consider taking a pair of shears to an especially frustrating project (haven’t done it … yet!). In those moments, I slowly back away from my sewing table and move on to something else.

But it’s possible to let something wither away undone for too long. Case in point: my version of Denyse Schmidt’s Big Zig quilt. Originally, I was working with a December 2013 deadline (for a Christmas present). Then it was a January 2014 deadline (for the same person, but for his birthday instead of Christmas). Now I’m going for the recipient’s half-birthday, in July. Yes, I am ridiculous. But half-birthdays should be real things—like, with cake and presents.

Photograph used by permission of DS Quilts

My original stab at this quilt was delayed by my Penny Sampler, although I can honestly say that life in general was delayed by my Penny Sampler. The Penny Sampler has been done since January, so what’s the holdup? The Big Zig is super easy to piece, and I’ve had the fabric.

I think it’s the quilting. I’m drawn to the simple geometry in some quilts. But there’s little forgiveness in the quilting here—especially in the way that Denyse quilted the original, with a contrasting thread! I will be choosing a more matchy-match color of thread, which should somewhat hide whatever flaws appear in my final quilt.

Photograph used by permission of DS Quilts

So I’ve assessed the situation and confirmed that what I have cut I can use. I wish I had written some notes about where I was in the process when I set it aside. (Truth be told, I didn’t think it would be ignored for half a year.) For example, one cut triangle had a pin in it. I’m sure that was meant to indicate something. It’s like a secret message from my fall 2013 self to my summer 2014 self. Too bad I can’t figure out what it is!

My version of Denyse Schmidt’s Big Zig

What’s your take on WIPs, Goldilocks? How many are just right?

And on another subject: how do you feel about quilting for dudes? This is my first quilt specifically for a guy (the rainbow quilt for my five-year-old son doesn’t count). What have you made for the men in your lives? I ask because I plan on embarking on another guy project. Thanks in advance!

Linking up to . . .

http://www.sewfreshquilts.blogspot.com/2014/06/lets-bee-social-26.html