Friday, December 30, 2016

Merry Christmas to Me

Gift giving is my thing. I love brainstorming gift ideas, consulting with the future recipient’s cohorts, and executing the purchase. It’s all the better when the occasion calls for something handmade.

There’s an inherent risk with giving a gift, though, especially when that gift is something I’ve made myself. Will the recipient like it? Will my investment of time and effort be worth it?

There’s one recipient in my life, however, whose gifts I always nail. And that person is me. For example, I adore my Christmas present to me ...

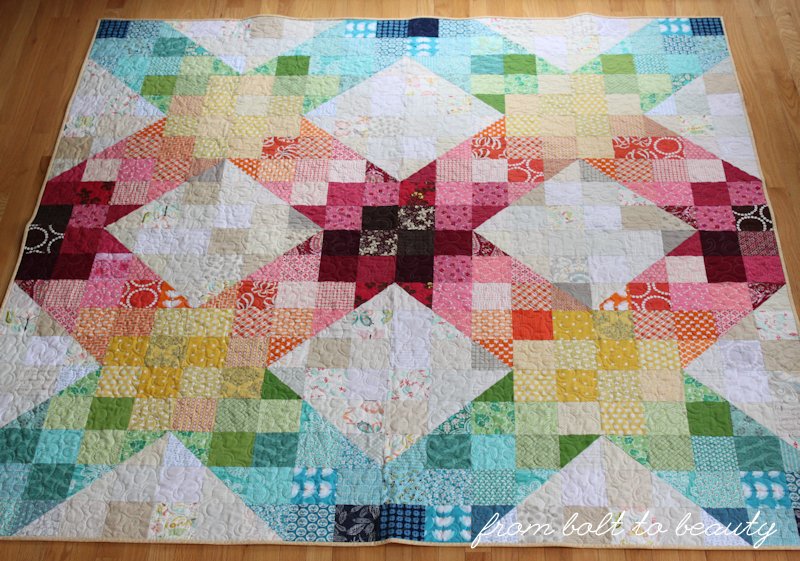
You can’t tell, but I had the bright idea to do a photo shoot in the
middle of a nor'easter.

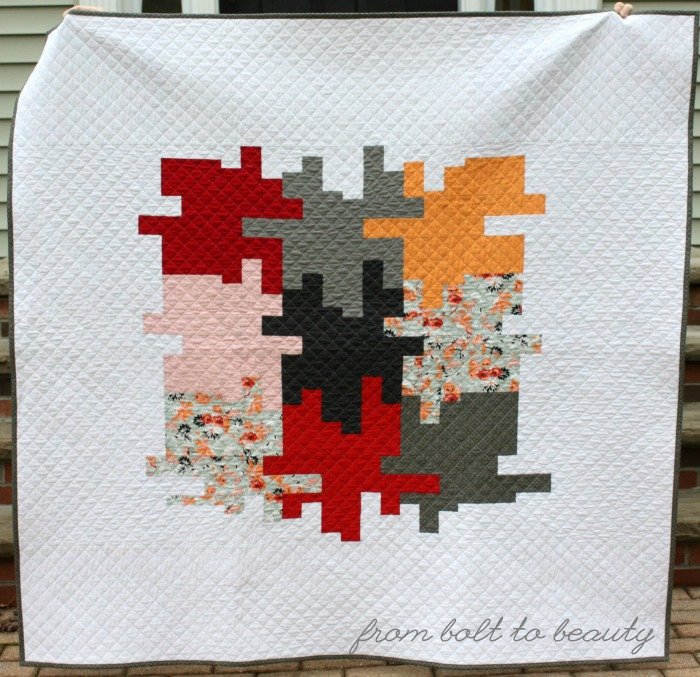
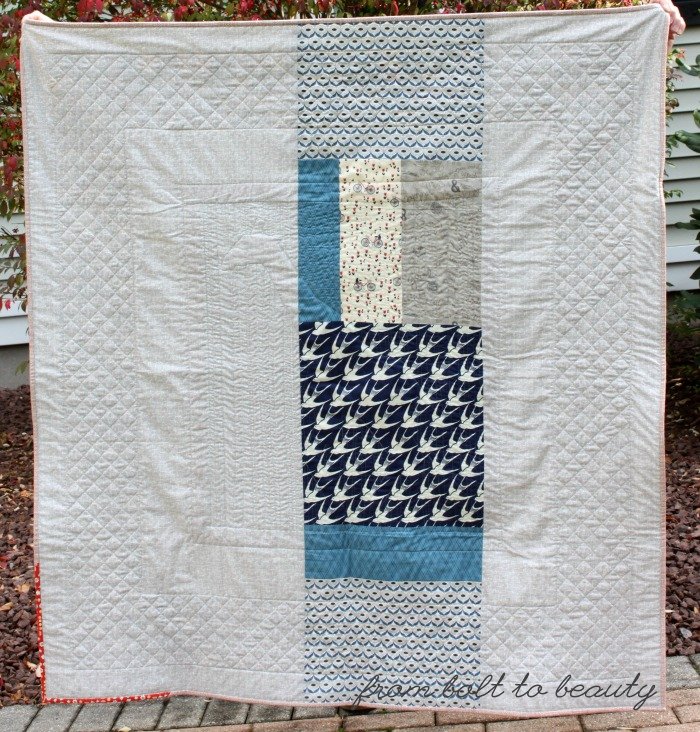
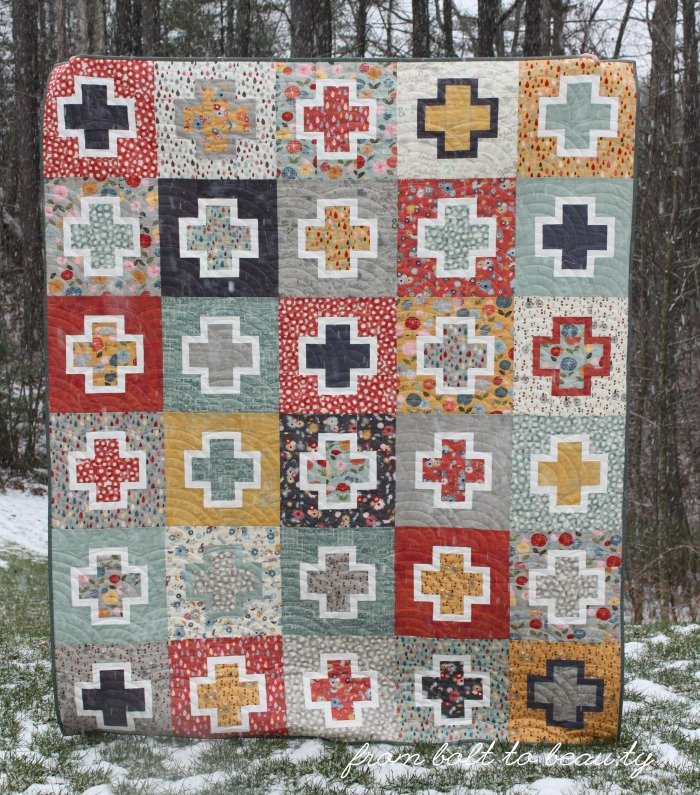
I started piecing this beauty, my Outlined Plus quilt, back in January 2016. I knew all along it was for me, so after completing the first set of blocks, I set it aside and worked on other higher-priority projects.

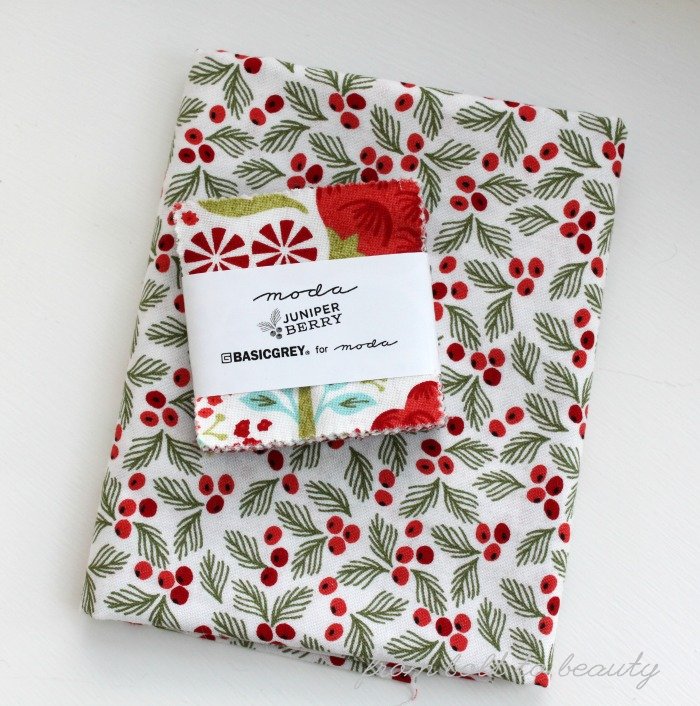
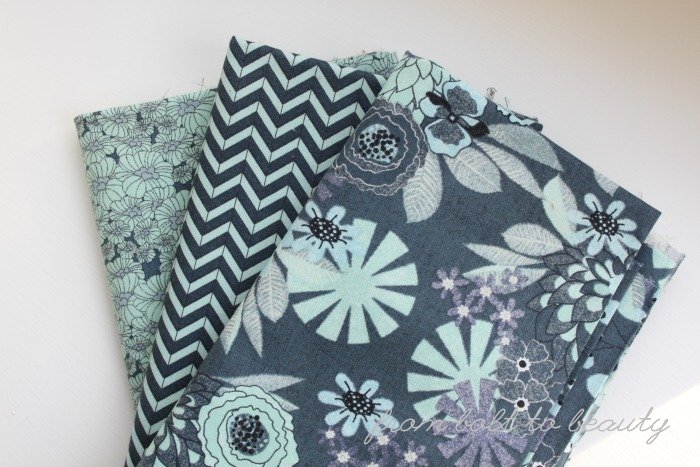
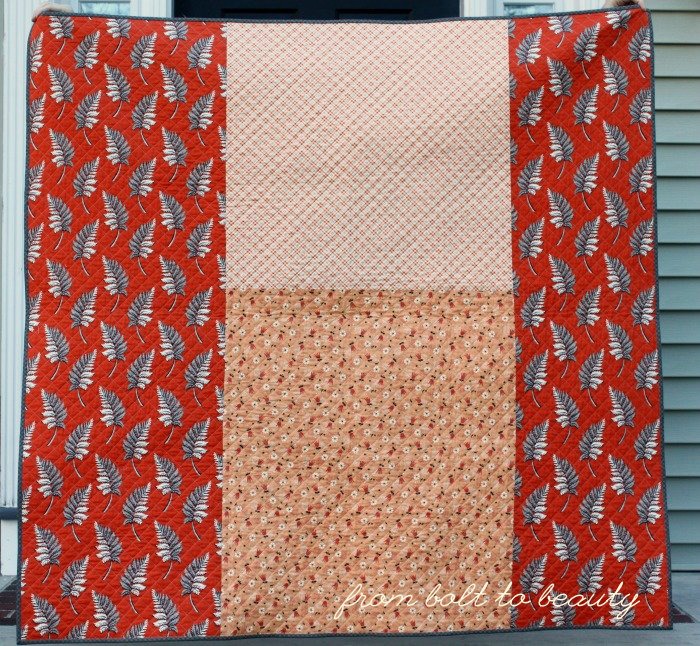
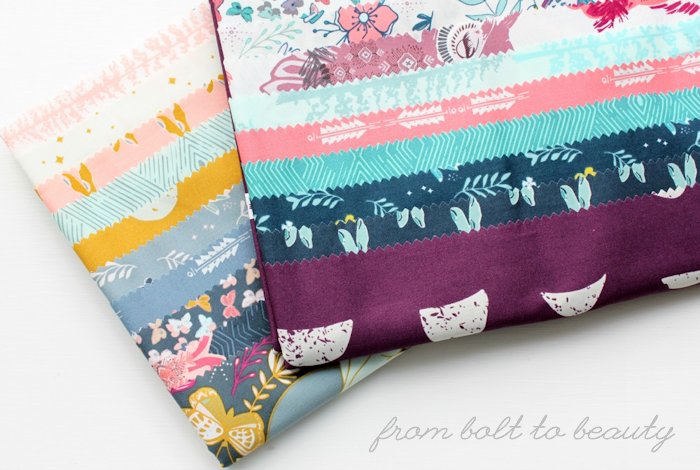
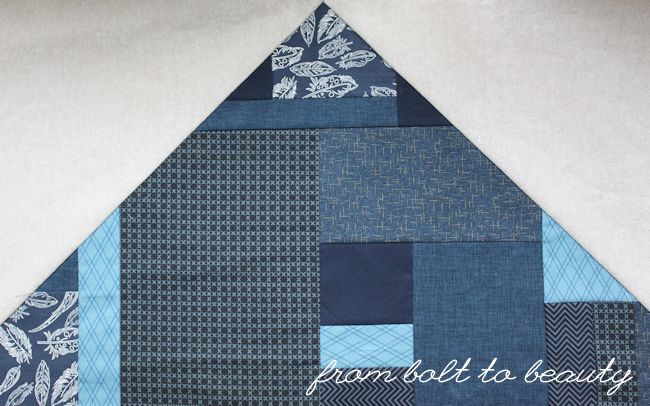
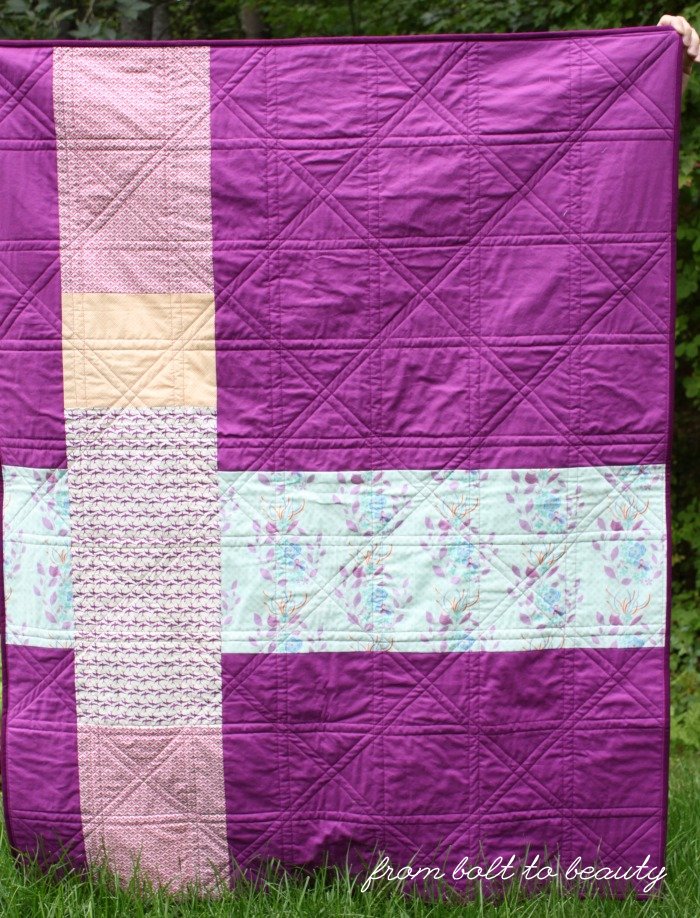
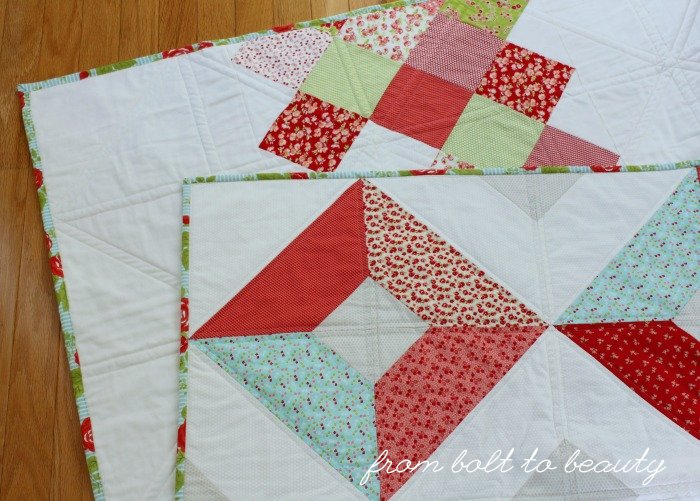
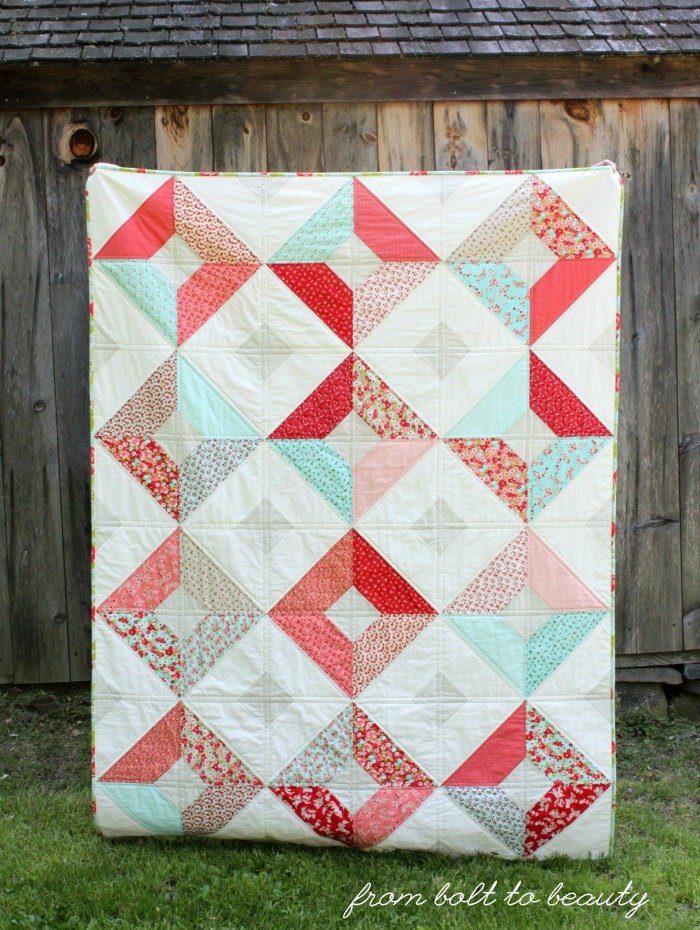
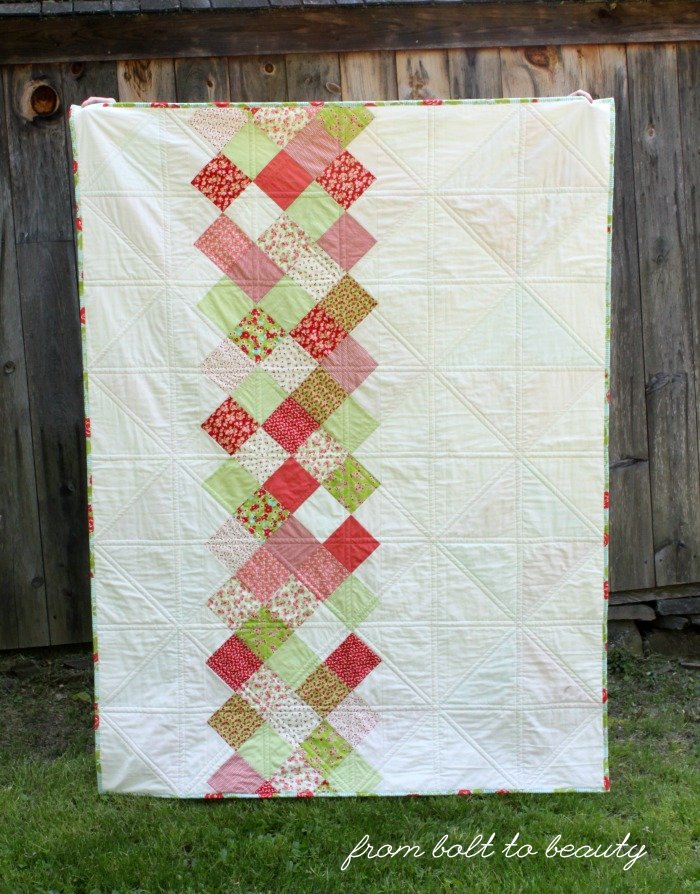
I chose this particular pattern, by Meadow Mist Designs, because I knew it was the perfect opportunity to showcase my stash of Mon Ami, a collection by Basic Grey. (I “earned” this fabric by avoiding Halloween candy last year. For real. Read about it here.) The back features some PB&J, also by Basic Grey, that I scored in 2015.

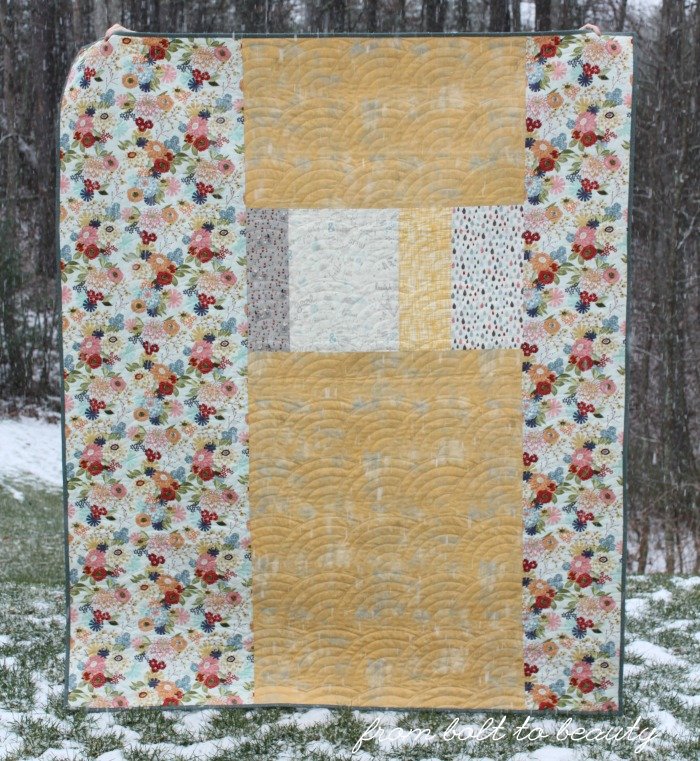
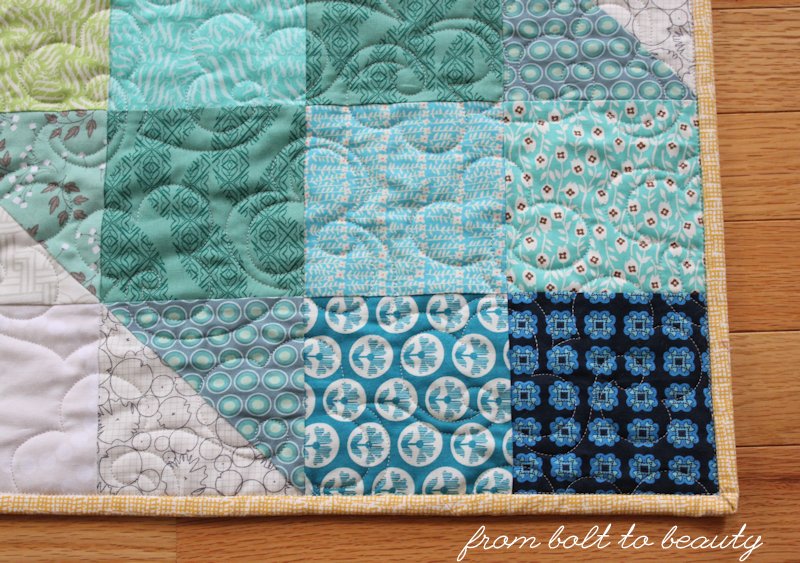
In addition to PB&J, there’s a bunch of Grunge on the back, too.

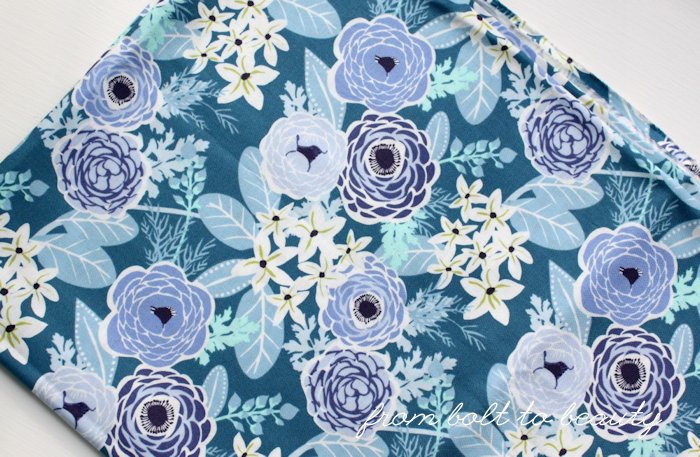
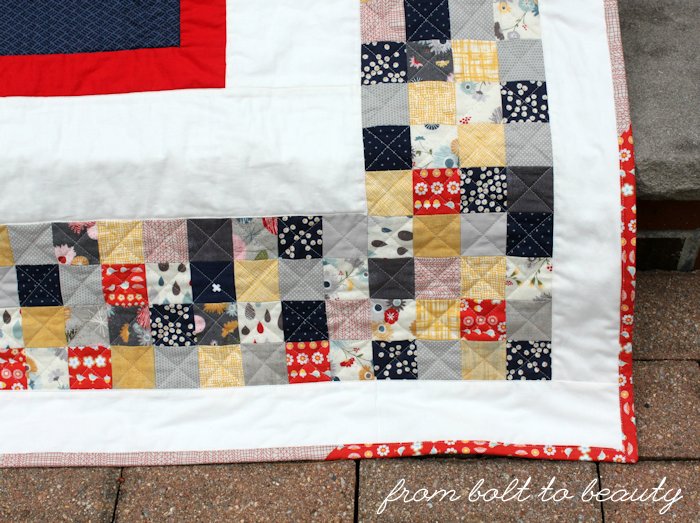
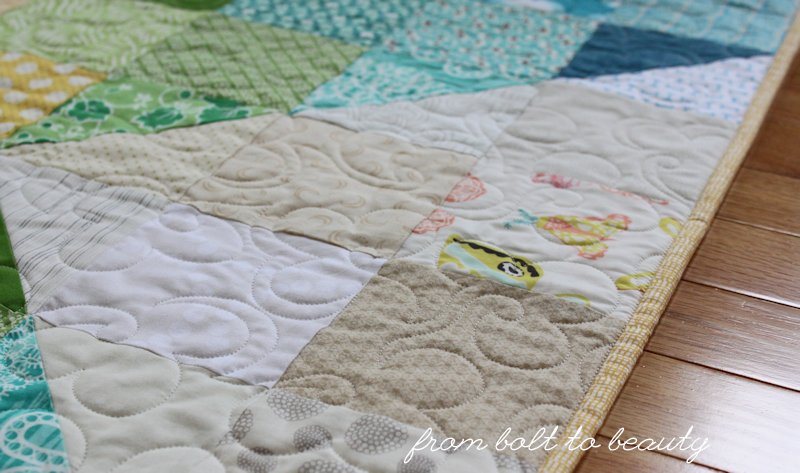
I initially took a purist approach to choosing the fabric for this project and wanted to use something from Basic Grey for the binding as well, but nothing in my stash worked. Luckily, I had a floral Moda print from forever ago sitting around, and its super-gray undertones matched the BG palette perfectly.

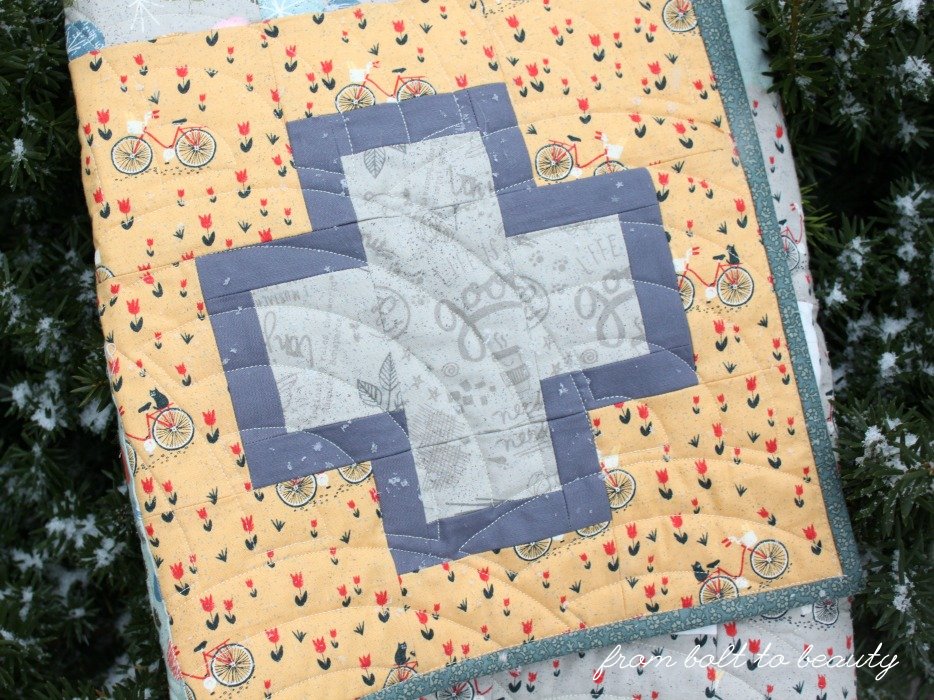
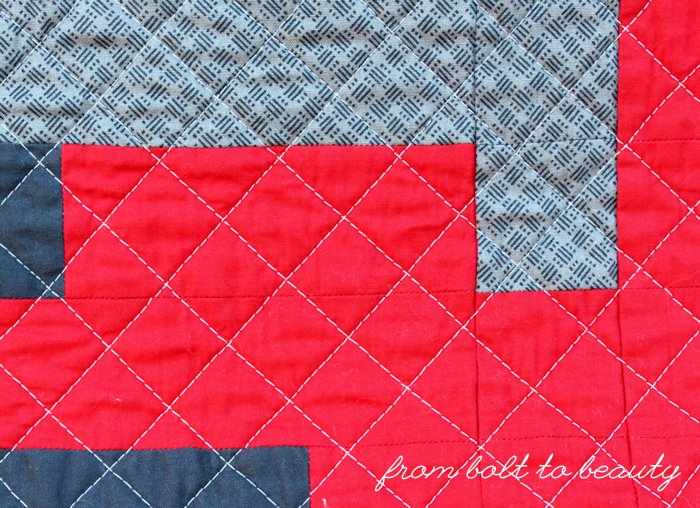
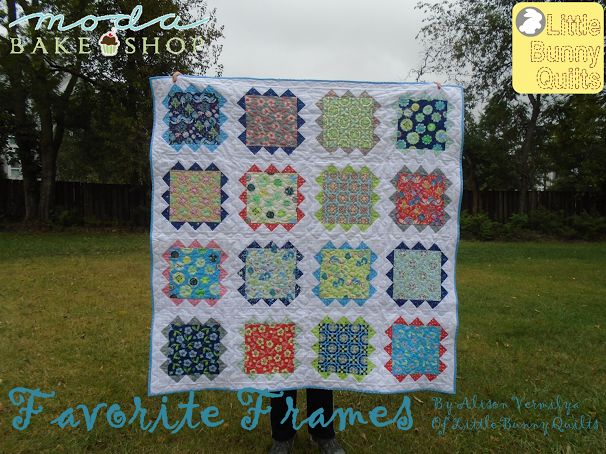
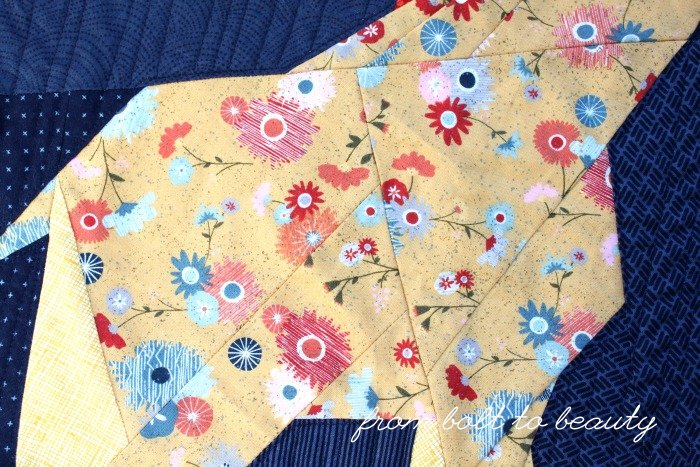
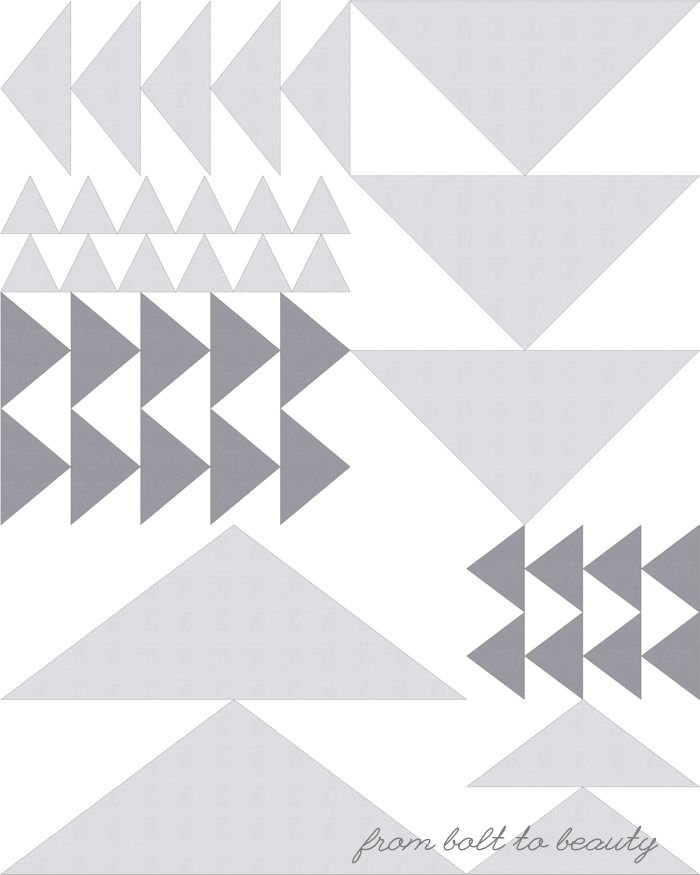
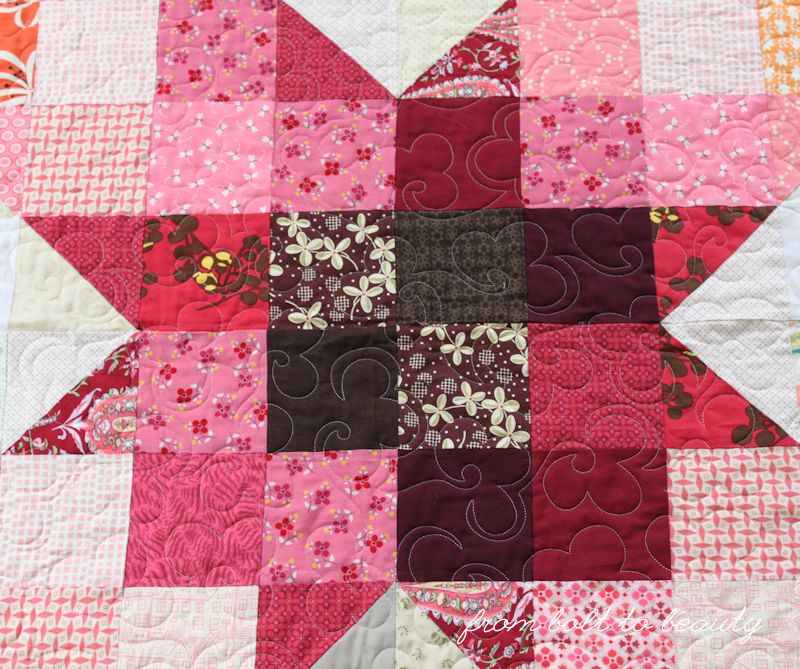
On its own this particular block is not my thing, but I love how it looks
in the overall quilt.

I’m proud to say that three big-girl decisions went into creating Outlined Plus:

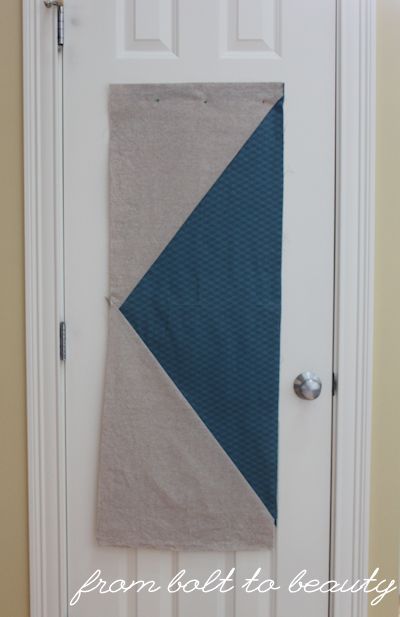
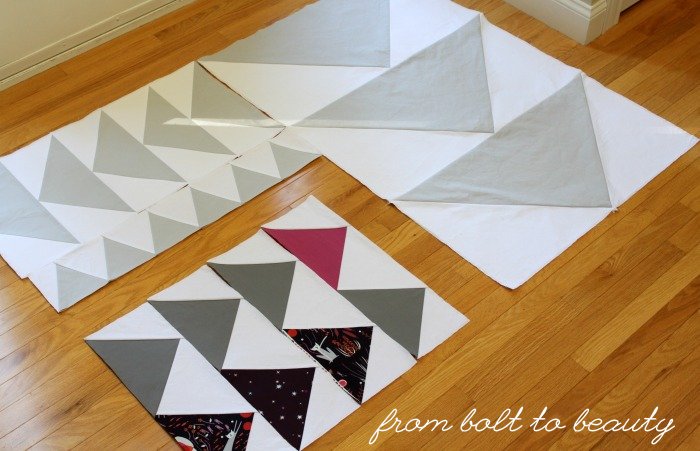
1. After making 20 blocks, I realized that I didn’t like the original color scheme and changed course. I ended up ditching 4 blocks. Two of them were handed off to another quilter; the others were “unsewn” and reused in blocks with the updated palette.

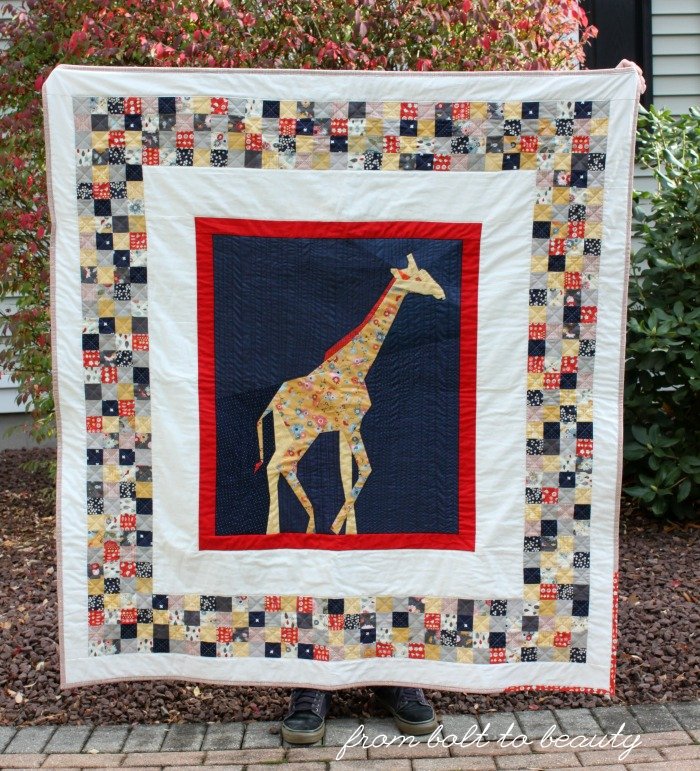
2. I had the entire collection of Mon Ami in fat quarters for this project, and there were a lot of scraps once I had finished piecing the top. I put those scraps to use immediately. A bunch went into Chelsea’s giraffe quilt. Others went to a fellow Basic Grey lover. I have less than a fat quarter of Mon Ami in my scrap bin now!

3. Instead of quilting this project myself, I handed it off to a friend for quilting. This quilt is made up of strong 90-degree angles; my straight-line quilting wouldn’t have done the design any justice. The Baptist fan quilting I chose fit the bill perfectly.

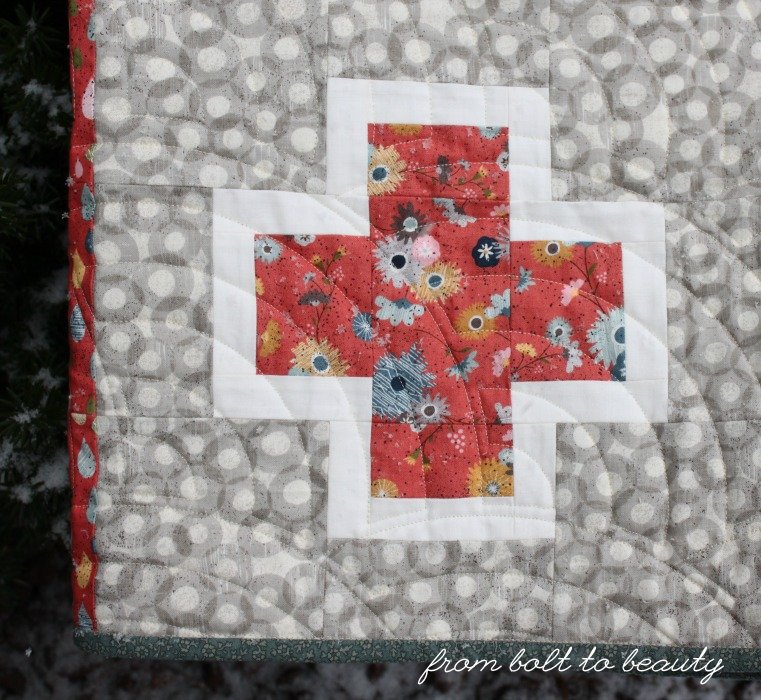
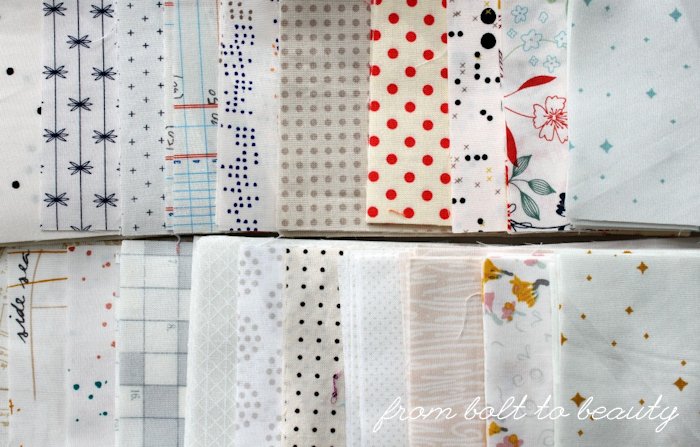
The grays, blues, and reds in Mon Ami are soooo nice.

When my husband saw this finished quilt, he asked who it was for, and I told him it was for me. He made some smart-aleck comment about having enough quilts in the house. For a fleeting moment, I thought he may be right. Then reason set in ... Too many quilts? Not possible!

So, did you give yourself anything over the holidays? (I know I’m not the only one.)

Linking up to Finish It Up Friday ...

Follow on Bloglovin

Saturday, December 17, 2016

AccuQuilt, Where Have You Been My Whole Life?

I know a lot of quilters who like finishing off their bindings by hand. They find the process relaxing and meditative, and after a project’s worth of hours at their sewing machine, it’s nice to hold something in hand to work on. I thinking doing stitch after stitch by hand is for the birds. What I like is cutting fabric. Sure, I make plenty of miscuts, but I find the leisurely process of ironing and arranging and cutting strangely satisfying.

Based on that, it’s weird that I decided to buy an AccuQuilt GO!—a machine that promised to reduce my hand cutting and allow me more time behind my machine.

I had plenty of reasons to pass on this purchase. For instance, it’s not cheap, and although the version I was considering came with a die, I would need to buy additional dies down the road. More dies = more money.

Despite my misgivings, I got my hands on my AccuQuilt GO! for a good price and then let it sit unused for months. During a recent creative slump, however, when I was spending time playing with fabric, Cynthia, over at Quilting Is More Fun Than Housework, mentioned that she was using her AccuQuilt fabric cutter to get her scraps under control. I took that as a sign to bust out my new toy.

This is my baby, the AccuQuilt GO! AccuQuilt makes a variety of fabric cutters. This version seemed to be a middle-of-the-road option suitable for me, someone who sews frequently. Cynthia, whom I mentioned earlier, has the Studio cutter, which is larger and more expensive.

I quickly got to cutting. I’ve had some patterns in mind—ones that will bust through chunks of my stash—and some of them used the 4½” square shape or the 2½” square shape that my cutter came with. Woo hoo! (My die also cuts shapes to create 2½” half-square triangles. I don’t foresee using that much, though. I am not fond of sewing on the bias and am content with my current method of making HSTs.)

I found the AccuQuilt GO! easy to use: I placed my fabric on top of the desired shape on the die, covered the die with a cutting board (which I would have photographed, but it’s not exciting to look at), and cranked those sandwiched pieces through the machine. The result was a perfectly cut shape.

This is the AccuQuilt GO! opened up. The die is the piece on the left; you can see the three shapes it cuts out.The fabric-and-die sandwich is propelled through the machine by the hand crank in front.

By folding the fabric, I cut multiple layers of fabric in one pass through the cutter. With Moda fabrics, I got clean cuts of three layers at a time; with finer fabrics, like those from Art Gallery, I got five or six.

These piles will someday become Lee Heinrich’s Scrappy Picnic Plaid quilt. I was able to cut the 2½” squares with my fabric cutter. Everything else was cut by hand, because I didn’t have dies to cut those shapes.


I cut these 4½” squares with my AccuQuilt GO! They’re destined to become a scrappy background for a quilt.

My scraps and yardage had reached an unwieldy size, and this adventure with my new fabric cutter has helped me get a grip on things. I’m not sure when I’ll actually sew these pieces into quilt tops, but it felt good to get fabric into neatly cut piles, ready for sewing.

I think the 2½” shape on my die will become crucial to my scrap-management strategy in the future. Right now, I store scraps by color, without cutting them down to usable sizes until I want to use them. In the next few weeks, I’d like to take a pass through my scrap bin and cut 2½” squares out of the smaller pieces. I think that exercise will help me chisel away at the sheer volume of scraps I have and make it more likely that I’ll actually use that fabric.

Do you have an AccuQuilt fabric cutter or something comparable? For what do you use it? And does it factor into your scrap-management strategy? If so, I would love to hear about it!

Linking up to Scraptastic Tuesday, Sunday Stash, and Needle and Thread Thursday ...

Follow on Bloglovin

Sunday, December 4, 2016

Another Source for Sunday Stash

About every three or four months, I resolve to stop buying fabric and use more of my stash, but I find myself in a perpetual catch-22: In order to use what I’ve got, I need to buy more saturated colors/low volumes/solids/etc. It’s a frustrating—and at times costly!—predicament.

There’s a guilt-free source of fabric, however, that presents itself on occasion, one for which I am most thankful. It’s those fabric-loving friends of mine.

In the past few months, I sent my odds and ends of Basic Grey’s Mon Ami line (used in this quilt and this one) to Judy, over at Sew Some Sunshine. I know she loves BG’s collections and thought she’d appreciate playing with Mon Ami. I was surprised when a care package from her arrived at my house a few weeks later.

She passed her scraps of BG’s Persimmon, used in her Interlock quilt, on to me and included a mini-charm pack of BG’s Juniper Berry, yardage from Juniper Berry, assorted 2-inch squares, Bonnie and Camille Scrumptious scraps, and Kate and Birdie scraps. I’m pretty sure that list covers it all, but there was so much, it’s hard to say for sure!

Persimmon


Juniper Berry


I’m sure the irony is not lost on you. I tried to trim my stash by giving some fabric away and ended up with more fabric.

Another BG story involves Chelsea, from Patch the Giraffe. She was on Cape Cod with our guild for a retreat back in October. I couldn’t go, but I was not forgotten. There’s this mother of all quilt shops on the Cape, Tumbleweed Quilt Shop, where Chels found some bolts of BG’s PB&J, one of my favorite lines. (I made a quilt with some PB&J mini-charm packs here. I discovered other bolts from the line during this trip.) Now I’m the happy owner of three yard cuts from this long out-of-print collection. Yahoo!

PB&J


I don’t have plans for any of this loot—yet. It’s all aging in my stash for the time being.

I’m serious, this time, though. I am going to bust my stash! As I grow as a quilter, I want to use more solids, and I stash almost exclusively prints. I have a plan to chip away at the hoard. I’ll fill you in on that scene soon!

Linking up to Sunday Stash ...

Follow on Bloglovin

Friday, December 2, 2016

Is This a Nine-Patch?

It’s been more than three years since I started quilting. When I’m not busy being a mom, I’m quilting, talking about quilting, or plotting my next quilting project. I’ve taken quilting workshops, attended quilting retreats, and been to more quilt shops (and spent more money) than I’ll ever admit to. Despite all this, I’ve never been to a quilt show. 

I’ll remedy this problem in February, when I attend QuiltCon in Savannah. I’m already crazy excited about the trip—the workshops I have signed up for, the blog friends I’ll meet in person, and that sweet quilt show. It seemed silly not to submit a quilt to the competition. My first time attending a quilt show could be the first time seeing one of my projects in a quilt show.

American Patchwork and Quilting is sponsoring a nine-patch challenge at QuiltCon 2017. The rules allow quilt makers to interpret the humble nine-patch in any modern way they wish. I had bunches of ideas for this challenge and ended up pursing what I call Mix and Mingle ...

True or false: This is a nine-patch.

When I set out to piece this quilt, I considered one question: At what point is a nine-patch no longer a nine-patch?! I started with an oversize nine-patch, sliced it up vertically, shifted the pieces, and sewed them back together. Then I sliced it horizontally, shifted, and sewed again. What results is, I think, modern, improvisational, and unique, offering just an intimation of the original three-by-three block.

I’m crazy about Mix and Mingle’s palette. The fabric that inspired it is the greenish-gray floral (above), by Carina Gardner for Riley Blake, which I used for two of the nine patches. The combination of orange, red, and gray has me smitten. And the back—eep! I love the back! It’s 100% Denyse Schmidt.

Dear Orange, I love you.

This quilt was finished with an all-over cross-hatch—after all, what is cross-hatch quilting other than bunches of nine-patches in thread form?

A simple cross-hatch for the win!

I know that the QuiltCon quilt show is rather difficult to get in to. I have seen some of the rejects over the years, and they are beautiful. I’m happy with this submission, however. I enjoyed making it, I know it is an accurate reflection of me and my taste, and I look forward to cuddling under it. If it doesn’t get into the show, I’ll be using it before year’s end—ha!

In general, I don’t quilt to enter contests; it’s just not my thing. Is it yours? I’d love to hear about your experiences in the comments. : )

Update 12/15/2016: Mix and Mingle was accepted into QuiltCon. Hurray! I look forward to seeing  it when I attend my first-ever quilt show. : )

Linking up to Finish It Up Friday and Let’s Bee Social ...

Follow on Bloglovin

Saturday, November 26, 2016

My Sewjo Is So Low

Friends, all is not right at From Bolt to Beauty world headquarters. My sewjo exited stage left, and with it went my enthusiasm for blogging. The root of my problem, I think, is some self-imposed deadlines and a dearth of finishes. Deadlines make this hobby feel more like a job, and although I have four quilt tops at three different long-armers, I won’t be getting anything back for a few more weeks. I need a successful finish to start feeling like myself again.

So what do I do? Play with fabric, of course—it gives my creativity a boost without pressuring me to accomplish anything. Right now, I’m working on assembling a fabric pull for a Scrappy Picnic Plaid quilt. This pattern, by Lee Heinrich (Freshly Pieced), was featured in the first Quilter’s Planner, which I have. Kitty over at Night Quilter is spearheading a quilt-along for this design on her blog and on Instagram. I won’t make the mid-December deadline, but I’m hopeful for a January or February finish.

I’m also considering tackling one of the following tutorials and making a just-because quilt—one that I make just because I want to make it, with no goals in mind other than to bust some of my fabric stash.

Amy Allison of Cluck Cluck Sew has released many beautiful tutorials over the years. I’m especially smitten with her Diagonal Strip Quilt Tutorial.  I can’t decide whether I want to chip away at my jelly roll stash or use this fabric, from Kate Spain’s Sunnyside line, as a palette inspiration and cut 2½” strips from yardage to match.

Sunnyside, by Kate Spain

When I saw Little Bunny Quilts’ latest tutorial for Moda Bake Shop, Favorite Frames, I knew it was for me. It features big squares—perfect for the large-scale prints I have on hand. I recently won the entire line of  Maureen Cracknell’s Nightfall collection in fat quarters. (I don’t win often, but when I do, I win big, people! Many thanks for Sharon Holland for holding the giveaway!) I don’t have the heart to chop up the line’s bunnies and owls, and with Favorite Frames, I won’t have to.

Favorite Frames, by Little Bunny Quilts

Nightfall, by Maureen Cracknell

Quilty confession #1: I don’t like pinwheels. They’re too traditional for my taste, but I’m open to a more modern take on them. I’m considering Lisa Calle’s Black and Pinwheels pattern, also found on Moda Bake Shop. The chunky blocks and Xs bring the accompanying pinwheels into the 21st century, and the high-contrast color scheme of orange and black is nice and modern.

Quilty confession #2: I also don’t like the traditional bear paw block. It’s too predictable, unless it appears in Live a Colorful Life’s Delta Breeze tutorial. Bear paws of different sizes in solid fabrics and oriented every which way? Yes, please.

There’s nothing like the anticipation of a new project to help my creativity. Does your energy to create wax and wane, too? If so, how do you navigate the creative doldrums? 

Follow on Bloglovin

Wednesday, November 9, 2016

More Than You Wanted to Know About the Quilting

Read about piecing this project here

Today’s post is for those readers who, like me, quilt on a domestic machine. (I sew on a Janome 1600P-QC—a semi-industrial machine that’s crazy fast and only straight-stitches.) I know that every machine and every sewer working a machine is different, but I think the conversations we have about quilting are important. Quilting is the hardest part of the quilt-making process for me. The more we share about our approaches, successes, and failures, the more information we have to execute our next quilting project.

Last week, I shared about my giraffe quilt, a project that presented some unique quilting challenges.

This quilt now lives with Chelsea, of Patch the Giraffe.

It is one of the few quilts I’ve made with a clear focal point—that beautiful paper-pieced giraffe, designed by the Tartan Kiwi—which influenced my quilting decisions. (My Scrappy Color Wheel is another quilt with a focal point.) Here’s how I approached the task ...

Quilting the Giraffe Center

As with all my quilts (even with those that are simple edge-to-edge straight lines), I started quilting this project in the center. I didn’t want to detract from the intricacy of my paper-pieced giraffe, though, so I opted to quilt vertical lines in the navy background around the animal. Using my walking foot, I quilted along the perimeter of the giraffe and then quilted the vertical lines. Once I reached the top or bottom of the navy, I’d pivot the quilt and work in the opposite direction.

The color in this picture is off, but this close-up gives you a good look at the quilting.

These lines were organic and imperfect on purpose—I didn’t mark a thing. It was a forgiving approach and a relaxing experience. I don’t think I’ve ever had so much fun quilting. (I never admit to enjoying the quilting part of quilt making, so this is momentous!)

When I quilt other projects, like my Cross My Hearts Quilt, I approach each line from the same direction. By pivoting the giraffe quilt—sometimes quilting from top to bottom, other times quilting from bottom to top—I encountered what I’d call drag. There are visible ripples in this section of the quilt, and there were two spots in particular where the fabric between quilting lines was puffy. My inner voice of reason (which takes the form of Sarah of Smiles Too Loudly, who has advised me about similar quilting dilemmas!) argued that I’d notice these issues less once the quilt was washed and dried. You can see this phenomenon in the picture above as well as on the back of the quilt ...

The back features my go-to net fabric from Dear Stella, along with some of
Basic Grey’s Mon Ami, Cotton and Steel's bluebirds, and more.

I also sewed around the perimeter of the navy background. In a perfect world, I would have started with that step—to isolate the giraffe center before filling it in with vertical lines—but I feared that approach would cause puckering. I always need some wiggle room to smooth out wrinkles on the fly. (Does that jibe with your quilting experiences? I am convinced I’m the world’s worst spray baster!)

Anchoring the Elements

I’m no fancy free-motion girl and was at a loss about what to do with the borders. Normally, I would have stitched in the ditch to ensure they’d stay put, but I pressed my seams open (I prefer to press to one side when ditch stitching) and stitched alongside the borders’ seams instead.

Quilting the Patchwork Border

At first blush, the patchwork border was a no-brainer. I could use the squares to quilt a simple cross-hatch, and that is what I chose to do. My concern was that the cross-hatch—with its regular, straight lines—would look weird with the imperfect vertical lines in the center, but maybe I was overthinking it. I’m curious ... What would you have done?

I love this scrappy corner of the binding as well as the adjacent cross-hatch quilting.

To my longarm-quilting friends: I didn’t mean to overlook you from the outset of this post. I’m convinced, however, that your quilting experiences are all rainbows and unicorns. Surely, purchasing a longarm would alleviate all my quilting woes! You’re free to tell me I’m off my rocker in the comments. : )

Read about piecing this project here.   

Linking up to Needle and Thread Thursday and Finish It Up Friday ...


Follow on Bloglovin

Thursday, November 3, 2016

Choose Your Own (Quilty) Adventure

Read about quilting this project here.

I’m amazed with how my quilt projects evolve. I rarely follow patterns, and when I do, it’s loosely—I always add my own tweaks. It’s even unusual for me to cut fabric for a project up front and then start piecing. I’ll cut some fabric and make some blocks, cut some more fabric and make some more blocks. I see projects as an organic process, as a series of decisions that lead me to the final product I can’t envision until it’s almost complete.

This phenomenon reminds me of those Choose Your Own Adventure Books that were popular when I was a kid. The difference with quilting—ack!—is rethinking a decision isn’t as simple as turning back a few pages. As a quilter, taking another path often entails ripping out stitches, if not editing blocks out of a layout or scrapping a project entirely!

I decided earlier this year to make a quilt for Chelsea, of Patch the Giraffe. She’s my quilty partner in crime. We’ve served as co-VPs for the past year in our guild, and our shenanigans include gambling for fabric, holding fabric hostage, and talking smack about each other’s productivity. I knew she didn’t have a quilt that featured her favorite jungle inhabitant and thought I’d remedy that.

I didn’t have a full vision for this quilt; I just jumped right in. This is what I created ...

Chelsea’s Giraffe Quilt

And this is how I got there, Choose Your Own Adventure style ...

You find multiple giraffe patterns. Which do you choose?

When I think of animal quilts, three quilt designers come to mind: Sew Fresh Quilts, Violet Craft, and Tartan Kiwi. All of them have giraffe patterns. Sew Fresh Quilts, in fact, has two giraffe patterns—Giraffe Love and Giraffe Family—but I wanted something that was less “new baby” and more “thirty-something with an inexplicable predilection for giraffes.”

Violet Craft’s giraffe, part of her Jungle Abstractions collection, is gorgeous. I had to rule that one out, too, though. I couldn’t imagine creating it in anything but solids, like the original, and I didn’t think I could infuse the project with enough of my personality, or Chelsea’s.

The Tartan Kiwi’s paper-pieced giraffe was another story. I could envision that pattern in a variety of colorways, and the pieced background had the potential for a scrappy approach that Chels would like. My decision was made.

It’s time to start piecing the quilt. Do you go with the slam-dunk palette or take a risk?

I know Chelsea’s preferred quilt style, colors, and fabrics pretty well. I decided to use a Zen Chic dot for the giraffe and incorporate teals and aquas—some of her go-to colors—to frame the animal. It was a slam dunk.

Some of the original fabric pull

Then, as I was about to prepare the fabrics for paper piecing, I came across a yellow floral from Basic Grey’s Mon Ami line in my stash. The Zen Chic dot was nice and it would serve its purpose mimicking the spots of a giraffe hide. The Basic Grey option, however, had personality. It was a focal fabric that could affect the direction of the rest of the quilt.

A focal floral from Basic Grey’s Mon Ami line

At the 11th hour, I ditched the sure-fire dots, along with the aquas and teals, and took a chance on the yellow floral.

The quilt is too small. How do you enlarge it?

Once the giraffe was pieced, I loved it. I used different navies from my stash for the background and was pleased with the contrast they created against the giraffe’s yellow hide. But at this point, the quilt was just 24 inches by 27 inches. Because I prefer to gift throw quilts instead of wall hangings, I needed to make it bigger.

I decided to add borders that would complement the giraffe without overwhelming it. At the time, I had 2-inch blocks from this quilt on my mind and soon started sewing 2-inch blocks together for this project, too.

A look at the border of 2-inch squares

I needed 456 squares for this endeavor—a number I didn’t calculate until I had pieced half of it, and by then there was no going back!

The giraffe needs something to frame it. What fabric do you use?

So the quilt was really coming together by now. I planned on laying out the different elements like this (from the center out): the giraffe, a Kona Snow border, the 2-inch blocks border, and another Kona Snow border. As I played with these parts on my “design floor,” however, the transition from the giraffe to Kona Snow seemed lackluster. That lovely animal needed something to set it off.

The natural choice to make the giraffe and its dark background pop was red (even though Chelsea hates red!). I would have loved to use something more orange-red, but the border of 2-inch blocks used a true red-red. I bought four different potential fabrics to use around the giraffe and ultimately settled on Kona Tomato ...

The giraffe framed in Kona Tomato

Afterword

Phew! I’m glad this project is wrapped up and that we both made it to the end of this long blog post. I have more to say about this quilt—I want to talk about the quilting—but I’ll save that for another day. (Update: I have since posted about the quilting here.)

The quilt back

In the meantime, do you have a comparable experience to share with us? Have you plunged headfirst into a project and ended up in a place—and with a quilt—you couldn’t have imagined in the beginning? Tell us about it in the comments!

Read about quilting this project here.

Linking up to Finish It Up Friday and Let’s Bee Social ...

Follow on Bloglovin

Tuesday, October 11, 2016

I Like My Blocks Big and My Palette Subdued

I’m a few dozen projects into my quilt-making career, and I’m still trying to figure out what my style is, what kind of quilts I like to make and design. I know that I gravitate toward quilts that straddle the line between modern and traditional. I also like lots of white. (I recently took a class with Timna Tarr and, when asked what my favorite color was, responded “Kona Snow.” True story.) And I really, really like my blocks and overall quilt designs big.

Here are three examples from the From Bolt to Beauty archives ...

* My Double-Sided Diamond Quilt features 18-inch diamonds.

* Bring On the Dancing Horses boasts even bigger diamonds.

* Obsession, designed by Laura Jane Taylor, is composed of four 40-inch blocks.

Longtime readers may remember my big geese from last year. I designed a quilt of gigantic triangles, some as long as 40 inches. The scrappy look I was striving for didn’t work in such dimensions, however, and I shelved the project.


But I couldn’t get the design out of my head. At the heart of it, this quilt is about shapes, so I set aside prints and color and mocked the design up in grays to emphasize these triangles and their size.


I’m halfway through piecing this project, and it’s been hard to stick with the gray palette. I cut up some precious Catnap prints to insert some color and character into the mix, but it didn’t work. I think I’ll forge ahead with Kona Shadow and Kona Pewter, and complete piecing the blocks in grays before I try to tweak anything again.


What does the subdued gray palette say to you? Do you find it serene (as Kim has been trying to convince me) or boring?!

Linking up to Let’s Bee Social and Needle and Thread Thursday ...

Follow on Bloglovin

Friday, September 30, 2016

A Finish for My Foxes

Lately there have been more project starts than finishes here at From Bolt to Beauty. All that is about to change, though.

First up: a finish for my foxes. I started this little-girl-size throw, which I call Foxes and Flowers, over the summer and detailed the rationale behind the fabrics used here.


If you remember that second post, The Anatomy of a Fabric Pull, you’ll notice that as I laid the quilt out, I added more fabrics, especially some purple and cream selections. I also was deliberate with my fabric placement, lining up the higher-value 3½” squares so there appears to be little diagonal lines throughout the quilt.


Most of my quilts are larger throws. I could lay this smaller project out on my dining room table, saving it from a run-in with puppy paws. (To date, my golden retriever has yet to wreck a quilt project. Fingers crossed that that doesn’t change.) Now that I see the final product head-on, I would play around with the block layout; there are too many bold blocks—all those deep purples and bright oranges—toward the bottom of the quilt. Oh, well—I’m over it!

Some simple quilting finished this project off. I followed the seam lines of the 6½” blocks and then quilted some diagonal ones. This process wasn’t as smooth as it should have been. I tempted the tension gods by using different top and bottom threads and quilted under artificial light at night. It wasn’t until the next morning that I realized my tension wasn’t quite right. Unpicking and requilting ensued.


But now she’s done and ready to be gifted. That’s a cause to celebrate in my book.

This was an easy and fun sew and, because it calls for different-size squares, a good way to use up scraps. Check out the pattern details at Stitched in Color.

This is the scene around here now that Foxes and Flowers is wrapped up: I have two quilts (this one and this one) at the long-armer, one almost ready to hand off to another long-armer, and three quilt tops that I’m going to finish myself. That’s a lot of quilt tops, and four of the six are for me. Some selfish sewing? Yes please!

What about you? Have you been sewing for yourself recently? I usually gift almost all of my quilts. It’s about time I grow the number living here at my house.

Linking up to Finish It Up Friday, Let’s Bee Social, and Needle and Thread Thursday ...

Follow on Bloglovin

Wednesday, September 21, 2016

BQF: Obsession Quilt

Hello again! I’d like to present my submission to the Blogger’s Quilt Festival, ROYGBIV category: Obsession.

The final reveal of Obsession was a long time in the making. This project wasn’t difficult to make, but I was determined to use as many scraps as possible. The initial scrap pull was back in November 2014. A second look through my scrap bin, in February 2015, grew my pile of squares for the project. Finally, I resorted to cutting some strips off my yardage, but it was worth it. And this past January, I revealed ...

Obsession, in all of her rainbow-y glory!


This swirly pantograph was the perfect complement to the angles of the design.


This project ate through colored scraps as well as low-volumes.


I trimmed Obsession in a net print from Dear Stella,
which I have in more colorways than I’ll admit to!

Design: Obsession, from Quilt-opedia, by Laura Jane Taylor

Size: 80” by 80”

Quilting: by the talented Garden Gate Quilting

Scrap usage: 400  4½” and 5” squares—woo hoo!

To see my other submission, click here.

To revel in the talent and inspiration of the Blogger’s Quilt Festival and vote for your favorites, visit the event at Amy’s Creative Side.

Follow on Bloglovin

BQF: Double-Sided Diamond Quilt (and Tutorial)

Friends, it’s that time of year again, when bloggers the world over congregate at the Blogger’s Quilt Festival to share their quilty triumphs.

I’m submitting two quilts to this fall’s festival. The first, for Original Quilt Design, is my Double-Sided Diamond Quilt. You may remember this project from its posting on Moda Bake Shop. (It is now available as one of my Almost Free for Charity PDF patterns here.)


The beauty of the DSD Quilt is that it uses one layer cake to make a quilt top and back. I used Bonnie and Camille’s Little Ruby for mine.


I gifted this quilt back in June, but I have a layer cake of Kate Spain’s Canyon set aside to make another, one for me.


To read my original post about this quilt, click here.

To see my other submission, click here.

To revel in the talent and inspiration of the Blogger’s Quilt Festival and vote for your favorites, visit the event at Amy’s Creative Side.

Follow on Bloglovin