I loved this project from the get-go and worked hard at fine-tuning the color transitions (see here and here). But once I realized what a 40-inch quilt would look like hanging from my bedroom wall, I had to regroup. There just isn’t anything mini about a quilt of that size.
I added to the length and height of the quilt easily enough. Then it was time to quilt. Sigh. Quilting never goes smoothly for me. I started by quilting along the wedges of the color wheel, extending each line to the edge of the quilt. Then I began echoing the border around the wheel. That’s when I saw puckering where those horizontal and vertical quilt lines intersected the lines radiating from the color wheel.
Was I basting adequately?
I spray my quilts all over (as opposed to Elizabeth Dackson’s approach of spraying every few inches, which I have since tried on another, yet-to-be-blogged-about quilt). I encountered some tutorials online that recommend setting basting spray with an iron. If that contributed to my problem, it was too late to fix it. I put that advice in my back pocket for another project and another day.
Was starting with diagonal quilting lines contributing to the problem?
My friend Kim and I discussed whether I was inadvertently stretching the fabric by quilting lines on the bias before quilting lines on the cross grains of the fabric. It was something worth considering, but if I stretched the fabric, there was no recourse. Stretched fabric is stretched fabric. Again, it was a factor I’d keep in mind for future projects.
Was I missing an opportunity to flatten out the fabric on the fly?
Another friend, Sarah, asked whether I wore gloves while quilting. I don’t—I consider them an accessory for free-motion quilting, not straight-line quilting. She showed me how she uses gloves to flatten problematic sections and avoid pin tucks like the ones I was experiencing. This was a technique I could try on this quilt, even at this stage.
In the end, I put the quilt in time-out for a few weeks. When I was ready to deal with it again, I ripped out a significant amount of the straight-line quilting outside of the color wheel itself (it’s worth mentioning that both Kim and Sarah cautioned me against this, but hey, I am a stubborn lady with perfectionist tendencies!). Then I started quilting again, this time working from the opposite direction I originally worked in, which meant I always had more quilt rolled up inside my sewing machine than I did hanging off of it. I also wore gloves and tried Sarah’s suggestion. It wasn’t easy to do with a spray-basted quilt; I had to loosen some sections to better manipulate the fabric. Together, however, these measures avoided any puckering. Woo hoo!
 |
| I was happy to use an Autumn Woods print, by Kate & Birdie, on the quilt top and binding. I used every bit of the yard I had on hand in this quilt. |
 | |||
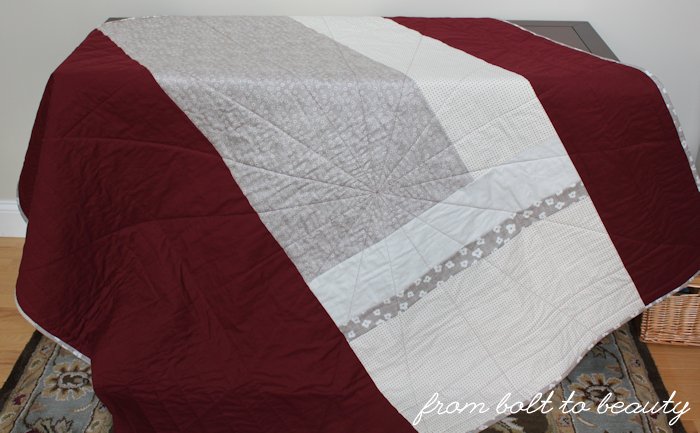
| This is a very me backing. I love how the two long swaths of Kona Brick frame the center patchwork. |
 |
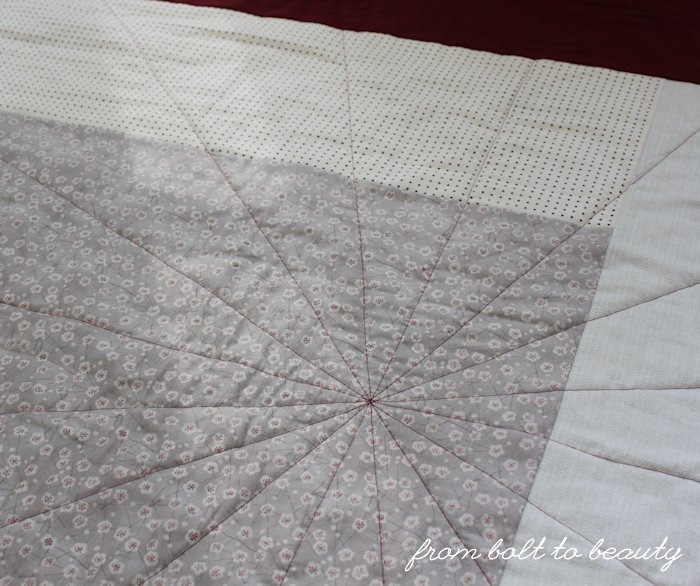
| I’m so pleased with how the quilting looks on the back, and I was happy to use that Edo Blossom print from Makower UK so prominently. Love it! |
This is my first finished quilt of 2015 and my first sizable quilting project in many months. What the heck have I been doing?! Minis. Bags. Quilt tops. Pretty much everything I could to avoid quilting. But I’m on a roll now! Expect a series of finished quilts over the next few months. : )
Linking up to Sew Cute Tuesday, Let’s Bee Social, Needle and Thread Thursday, TGIFF, and Finish It Up Friday ...


Love hearing that other people go through the same thought process as I do when puckering happens! I just end up unpicking and trying again in the other direction like you mentioned! Now I do a combination of spray and pin basting, just to be sure!
ReplyDeleteLove the finished product!
Thank you for sharing your experience! I have yet to quilt a large quilt with anything other than an all over design (meander/loopy meander are my go to's) so I haven't encountered this -- yet.
ReplyDeleteRegardless of the puckering issues, its still so gorgeous! I think this happens to us all at one time or another! It makes me mad too...really mad! Timeout for that quilt was needed!
ReplyDeleteThanks for sharing the whole process with us Michelle! I always get stuck at the quilting part of my projects too like there's some invisible barrier I literally need to get over and I don't always know how. One of my next projects will be quilting a triangle quilt and I wanted to straight line on the bias (along the edge of the triangles) but now I'm wondering if that'll be more of a nightmare than I expect cause of the bias. Sigh, only one way to find out.
ReplyDeleteThanks for sharing this. I had issues with a quilt I was rushing to finish for Christmas and honestly, I should have ripped out the entire thing and redid it but I was being stubborn (so I only ripped the worst lines) - the culprit was definitely my pressure foot settings. I convinced myself that it would look ok after it got washed and crinkled up and while it looked better, it still wasn't what I wanted.
ReplyDeleteI do agree with Sarah on wearing gloves with straight line quilting, and I always use a walking foot, though it doesn't entirely prevent puckering. In the end your quilt turned out beautifully and the simple quilting works well.
ReplyDeleteQuilting often takes the fun out of piecing....if there's gonna be problems, that's where they tend to surface. Good for you for figuring it out and making it work! Love it!!
ReplyDeleteThis comment has been removed by a blog administrator.
ReplyDeleteWhen this has happened before to me it was because my presser foot pressure was too high (that does not seem to be the issue in this case). I am glad you decided to unpick it and wound up with a beautiful quilt you can enjoy.
ReplyDeleteI love your throw! It turned out wonderfully, despite the difficulties. Your color changes are so beautifully done. Quilting is actually one of my favorite parts of the process, but I do get pucker problems on occasion, especially since I started spray basting. I find I can often see the issue coming and either modify the motif or use my hands to pull the excess fabric to a less noticeable place. Free motion can actually be a bit more forgiving in that way. Regardless, though, you have a beautiful quilt!
ReplyDeleteThanks for sharing, I love your color wheel! I have the same problem when straight line quilting, and still haven't found a good solution! Maybe I'll try quilting gloves too!
ReplyDeleteI've given up spray basting anything larger than a mini as I got awful puckering on a 60" throw. Pins works for me as i really smoosh the quilt up and wrangle it around quite a bit when I'm quilting!
ReplyDeleteStraight lines on my sewing machine rarely work out well. I just avoid them or sew them on my long arm instead. Gloves are absolutely key to FMQ. I didn't use them for a long time, but once I started, I couldn't stop. (That Sarah's a smartie, too bad they don't make yellow Machingers!)
ReplyDeleteIt looks really beautiful! Ah, the joys of quilting!!!
ReplyDeleteLooks great! I love color wheels and yours is no exception. I also spot some similarities in behaviour. I also do many things before I attempt quilting :)
ReplyDeleteSounds like you gave your problem a lot of thought... so frustrating when you get to the quilting stage and have things go pear shaped. You're very patient to have ripped out quilting... I hate doing that. I use gloves no matter what I'm quilting. I find it easier to grip the quilt and I end up with less neck and shoulder strain.
ReplyDeleteI love colour wheel quilts - great work!
ReplyDeleteYou persevered and conquered that colour wheel quilt, Michelle! This piece shows off some really gorgeous fabrics and the quilting turned out beautifully. Congrats on a fabulous finish!
ReplyDeleteThis is one gorgeous quilt! Despite all of the challenges, it really turned out beautifully!
ReplyDelete:) Kelly @ My Quilt Infatuation
What fun is quilting without a challenge or two? I mean, part of the reason we love quilting is that it forces us to grow, right? Okay then, consider challenges a part of that growth and suddenly challenges are fun! And when we meet the challenges with such beautiful work as this quilt, well, it's truly awesome. Imagine how much more beautiful the quilt is because you were challenged, connected with friends to brainstorm, questioned the obvious, and pushed through to completion. Now that quilt has a story and you have a success that is both beautiful and means so much more than just a finish. Wow! I'm impressed!
ReplyDelete