
 |
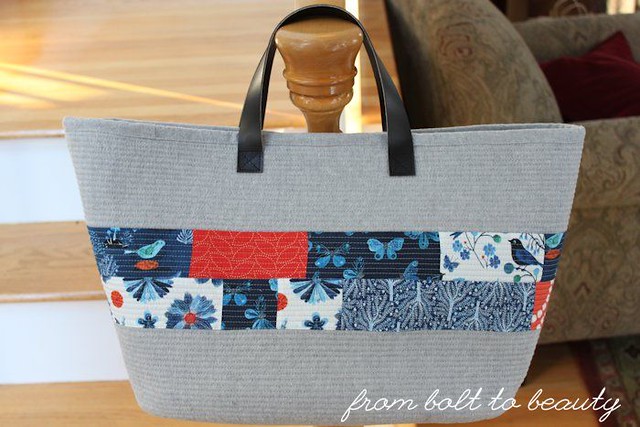
| Yahoo! I got the lining right on this En Pointe Bag! |
Before I was a quilter, I was a bag maker, and an experienced one at that. I’ve made patterns by Noodlehead, Lazy Girl Designs, Amy Butler, and others. No matter how many notches I have in my bag-making belt, however, the part that has the potential to cause me problems is sewing the lining.
My most recent lining-related snafu was with Noodlehead’s Market Bag. When the bag was finished, the lining didn’t fit as nicely as I would have hoped. It was too darn bulky. Since I was working under a deadline—the bag was a belated birthday gift for my sister—I didn’t take my time and trouble-shoot.
 |
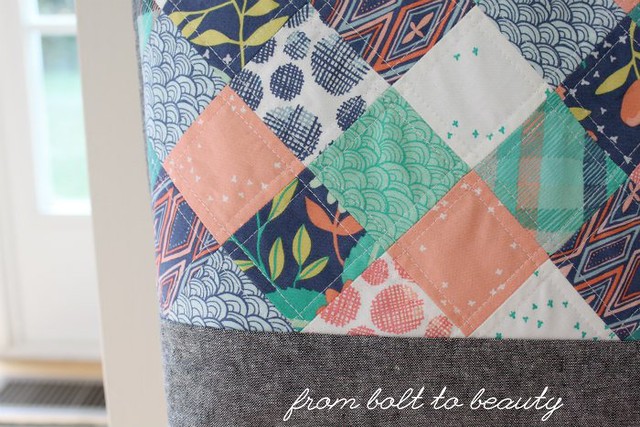
| To read more about this Market Bag, click here. |
While making Kairle Oaks’ En Pointe Bag pattern for a second time, however, I decided to wise up and make a conscious effort to evaluate the fit of the lining before it was sewn into the exterior.
Now, the En Pointe Bag is a much simpler pattern than the Market Bag. Both its interior and exterior are rectangles. The pattern calls for using Pellon’s Décor Bond, which gives the bag pieces a crisp hand. Once pieces are lined with Décor Bond, however, it’s like sewing two pieces of construction paper together—there’s no give and no way to ease an ill-fitting lining into the bag exterior.
To gauge the fit of my lining, I cut the lining pieces a quarter-inch shorter in both width and height. Then I sewed a few inches along the top of both side seams. I finger-pressed those seams open and placed the lining into the bag to assess the fit. I did the same for the bottom, sewing a few inches in the middle of the bottom and finger-pressing the seam open. I decided to take a little more off the lining height as a result of these extra steps, and the completed project was better for it.
 |
| I used Essex Linen and Midnight Garden, by One Canoe Two. |
Getting the lining to fit right had me so preoccupied that I didn’t realize until I was about to finish attaching the binding that I had twisted one of the straps. (NOOO!) I’m pretty sure this was a first for me and bag making. Instead of completely ripping out the stitches from multiple steps in the pattern, I managed to “unsew” one side of the bag, fix the strap, and get back to where I had left off.
Here’s the spot in question. I think the strap looks pretty good, considering the ordeal required to fix my mistake.
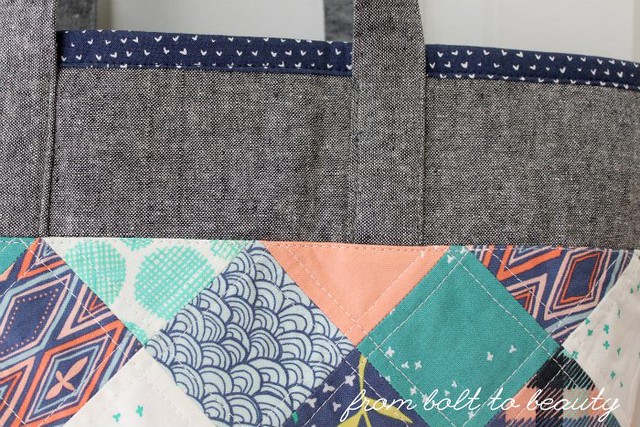 |
| Here is the strap in question, all better! |
The real test of my ability to take my time and sew a well-fitting lining will be my next Market Bag. I have all the pieces cut (including cute hand-basted hexies that are ready to be appliqued to the exterior!). Now I just need to find the time to sew it.
Do you have any words of wisdom about bag making and lining? What about cautionary tales, like my twisted strap?
Linking up to Main Crush Monday, Let’s Bee Social, and Needle and Thread Thursday ...

Super cute bag! I like making them too, and I have twisted a handle. Not fun.
ReplyDeleteI have a pattern I have designed, not written up, and with the lining I always sew a little larger seam on the sides and bottom and that made a difference. Bags can be really fun to make!
ReplyDeleteYes! Sometimes just sewing a 3/8" seam does the trick for me. More of a modification will be needed to my next Noodlehead Market Bag, however. There's so much interfacing to account for in that pattern. Wish me luck!
DeleteI have noticed this problem with bag linings myself and I don't know why the pattern makers don't address it. Thanks for sharing your solution.
ReplyDeleteGorgeous bags! Your Sister is very lucky! ☺️
ReplyDeleteI have mad respect for bag makers! I am not one of them, but love seeing them!
ReplyDeleteBoth of your bags are adorable! They make me want to run off and make a bag right now!?! Do you ever watch Sara @ SewSweetness? She has a live YouTube/Facebook show every Sunday night and Tuesday night with bag making tips and Q & A's. After it's finished, the show is uploaded to YouTube.
ReplyDeleteHi Michelle! I am not a bag maker, but I am going to attempt one for my sister-in-law soon. I am happy to read your suggestions, and will check out Nancy's as well. The bag she wants has all kinds of pockets on the inside which I imagine will add another wrinkle to the finish I suspect. Happy Wednesday! ~smile~ Roseanne
ReplyDeleteVery cute bag! I have only made a few bags so far and usually sew the lining with a little larger seam allowance (and that has helped on most bags but some still seem to have a baggy lining). Thanks for the additional tips.
ReplyDeleteI haven't tried it, but there is an interesting technique of sewing the lining corner to the bag corner before turning it right side out so that the lining sits in the bag better. It's on the Allison Sews blog under A Wonder Full Zipper Pouch Secret. I'm thinking it would only work if you do one where the unsewn opening is in the lining bottom, not one where you put the lining and the bag together and stitch around the top. Gorgeous bag Michelle!
ReplyDeleteThe bag looks great! Linings are a pain-in-the-butt so I'm glad it worked out, despite the near miss with the strap.
ReplyDeleteThe bag is lovely! Thanks for sharing your process. I'm glad the extra time and troubleshooting gave you good results. :-)
ReplyDelete