
Fabric Requirements
1 jolly bar of Bonnie and Camille’s Hello Darling or (42) 5” x 10” print rectangles for the diamonds
2 yards of solid fabric for the background
½ yard of fabric for the binding
3 yards of fabric for the backing
55” x 62” piece of batting (this provides approximately 3” of overhang on each side)
Thread to match
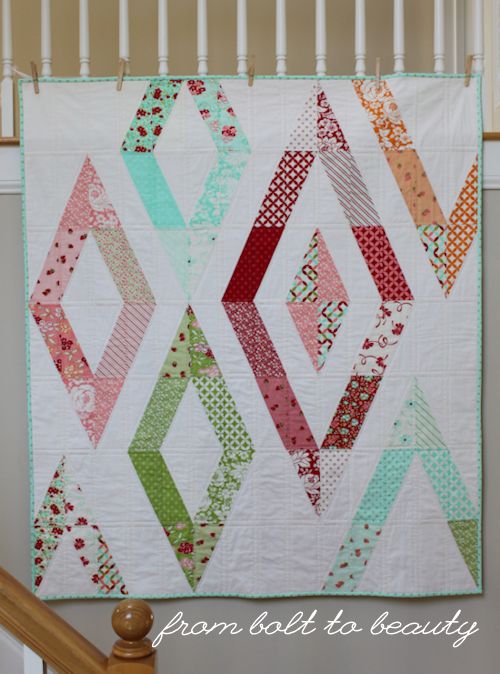
Finished size: approximately 49” x 56”
All seams are ¼”. Cutting instructions presume 40” of usable fabric after selvages are removed.
A Word on Half-Rectangle Triangles
Half-rectangles triangles (HRTs) are constructed differently than half-square triangles. With half-square triangles, you draw a diagonal line on one square of fabric, pair it with another square, sew ¼” on either side of the line, and cut on the line. The process results in two half-square triangles, which you can rotate however you like.
You can’t rotate HRTs like half-square triangles. There are left rectangles and right rectangles.
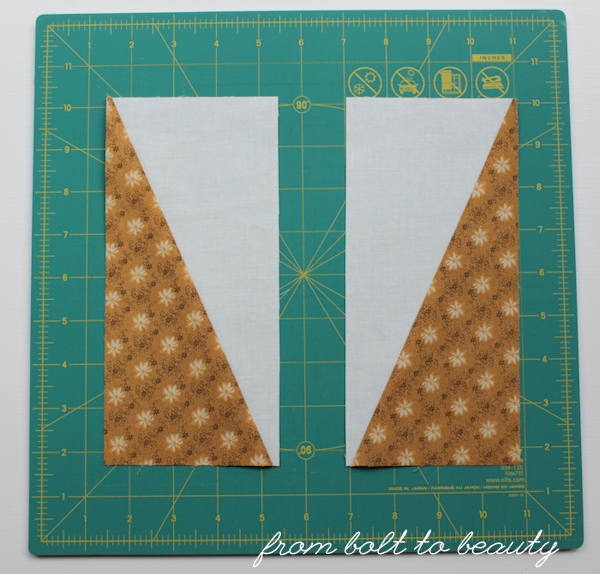 |
| A left HRT and a right HRT. |
The pattern that follows includes instructions for both kinds of HRTs without requiring a special ruler. Please note: The pattern uses the entire jolly bar. I recommend that you practice sewing a set of left triangles and and a set of right triangles on scraps first.
Cut the Background Rectangles
From the solid background fabric:
Cut 5 strips 10” width of fabric (WOF). Cut each strip into 5” x 10” rectangles. Each strip yields 8 rectangles for a total of 40 rectangles.
Cut 1 strip 5” WOF. Cut 1 rectangle, 5” x 10”, from that strip. Added to the 40 rectangles cut in the previous step and a white-on-white 5” x 10” print from the jolly bar, you will have a total of 42 rectangles, all 5” x 10”. (If your jolly bar does not contain a white-on-white print, cut another 5” x 10” rectangle from the 5” WOF strip. Later in the pattern, you’ll have an extra 5” x 10” print rectangle.)
Cut 2 strips 8.5” WOF. Cut those strips into 4” x 8.5” rectangles. Each strip yields 10 rectangles for a total of 20 rectangles, 19 of which you’ll use in the quilt and 1 extra.
Plan the Diamonds
Separate your 5” x 10” print rectangles into 8 piles, 1 for each diamond. Refer to the image and table, both below, which spell out the requirements for and placement of each diamond.
D1: 6 print rectangles
D2: 4 print rectangles
D3: 6 print rectangles
D4: 10 print rectangles
D5: 2 print rectangles
D6: 6 print rectangles
D7: 2 print rectangles*
D8: 5 print rectangles
*Note: You will use an extra left triangle from D1 or D2 to complete D7.

Mark the Solid Rectangles
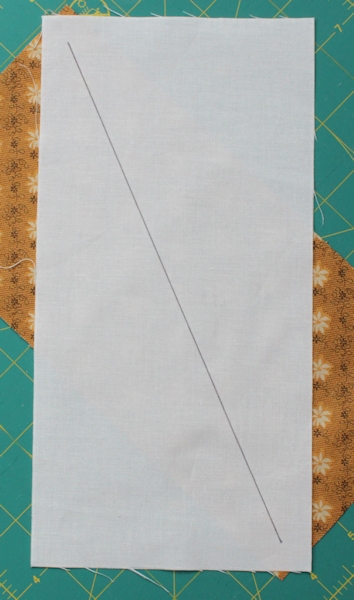
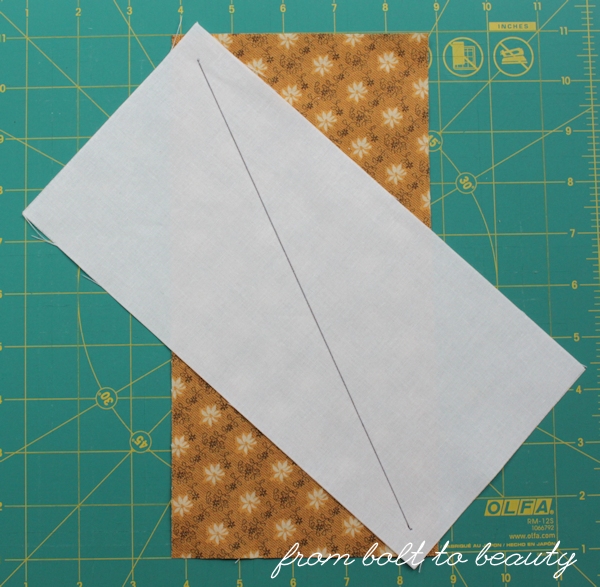
Take 22 of the 5” x 10” solid rectangles. On the wrong side, measure and mark ½” horizontally and vertically from the bottom left corner and ½” horizontally and vertically from the top right corner. Connect the two marks with a diagonal line. In the next step, we will pair each of these pieces to a print and call the pair a left triangle pair (LTP). Sewing and cutting those pieces will result in 2 left triangles (LTs).
 |
| Make your diagonal line from bottom left to top right. (You will add the print fabric in the next step.) |
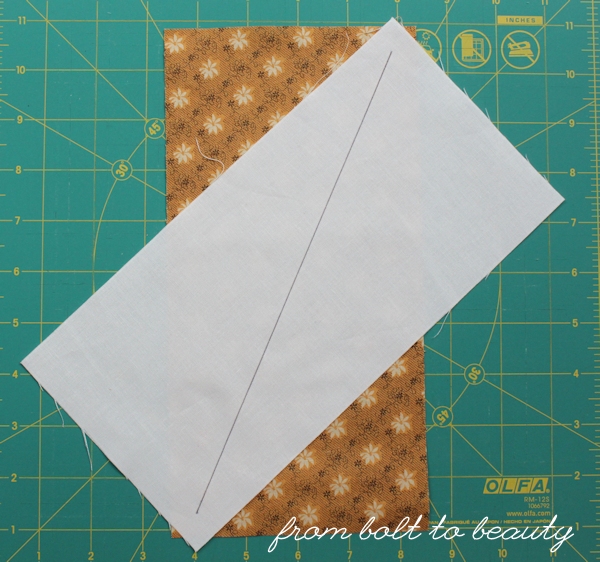
Take 20 of the 5” x 10” solid rectangles. On the wrong side, measure and mark ½” horizontally and vertically from the top left corner and ½” horizontally and vertically from the bottom right corner. Connect the two marks with a diagonal line. In the next step, we will pair each of these pieces to a print and call the pair a right triangle pair (RTP). Sewing and cutting those pieces will result in 2 right triangles (RTs).
 |
| Make your diagonal line from top left to bottom right. (You will add the print fabric in the next step.) |
Mark the Prints and Match to the Solids
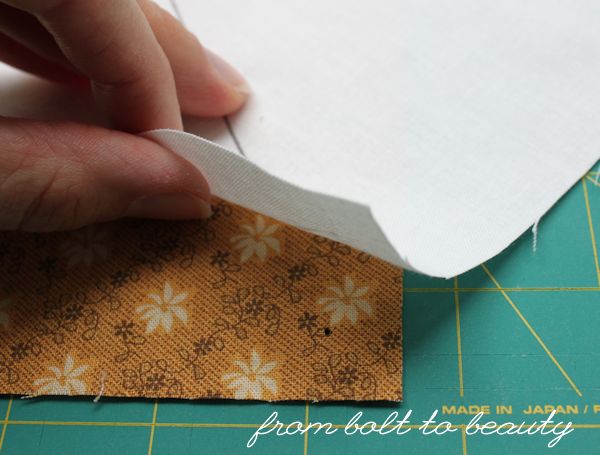
To make a LTP, take a solid 5” x 10” rectangle with a diagonal line from the bottom left to the top right. On a print, mark dots at the ½” point horizontally and vertically from the top left and bottom right corners on the right side of the fabric. Place the rectangles right sides together, matching those dots on the print rectangle to the end points of the line on the solid rectangle. Pin.
To make a RTP, take a solid 5” x 10” rectangle with a diagonal line from the top left to the bottom right. On a print, mark dots at the ½” point horizontally and vertically from the top right and bottom left corners on the right side of the fabric. Place the rectangles right sides together, matching those dots on the print rectangle to the end points of the line on the solid rectangle. Pin.
The table below shows how many LTPs and RTPs are needed for each diamond.
D1: 3 LTP, 3 RTP
D2: 3 LTP, 1 RTP
D3: 3 LTP, 3 RTP
D4: 5 LTP, 5 RTP
D5: 1 LTP, 1 RTP
D6: 3 LTP, 3 RTP
D7: 1 LTP, 1 RTP*
D8: 2 LTP, 3 RTP
*Note: You will use an extra left triangle from D1 or D2 to complete D7.
Sew and Trim the HRTs
Sew a ¼” seam on either side of the line on all the LTPs and RTPs. Cut along the line and press seams to the darker fabric. Trim to 4” x 8.5” ...
First, trim equal amounts (a little more than ½”) off both sides width-wise:
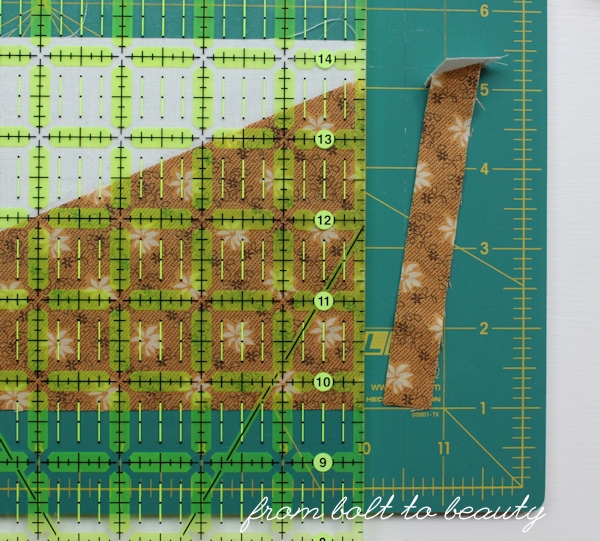
Then, trim equal amounts (a little more than ¼”) off both sides length-wise:
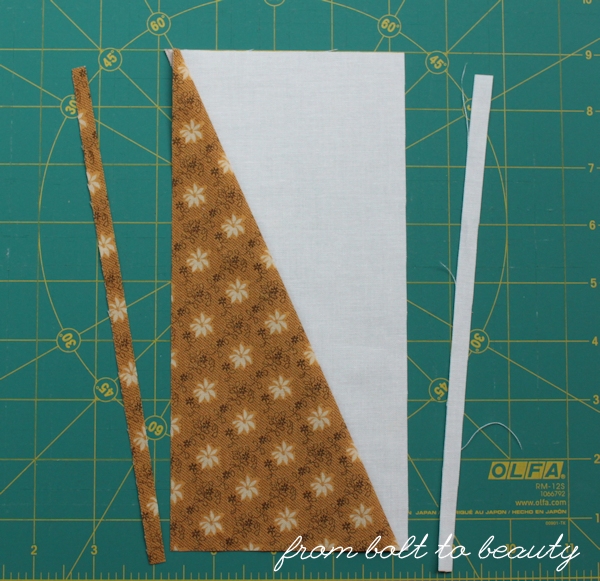
It’s worth noting that the seam will not bisect the corner angle as it would in a half-square triangle. Instead, the seam hits the corners at ¼” mark.

Lay out the Diamond and Background Pieces
Lay out the diamond pieces and background pieces, as shown in the image below.

Red indicates a left triangle. Blue indicates a right triangle. White rectangles are 4” x 8.5” pieces of the solid background.
Sew the blocks in the rows, pressing seams open. Join the rows, pressing seams open.
Finish Your Quilt
Cut the 3 yards of background fabric into two rectangles: 1.5 yards x WOF. Sew the two pieces together along the longer side, and trim to approximately 55” x 62”. Quilt and bind as desired.
Linking up to Tips and Tutorials Tuesday ...

Cute quilt! Thanks for the tutorial on HRTs :)
ReplyDeleteBeautiful quilt and great tutorial! I have never made HRT, but they are on my list now.
ReplyDeleteLove the quilt! Thank you for sharing!!
ReplyDeleteThis looks amazingly complicated. Sorry I don't get the diagonal piecing when you place the fabric diagonally. I guess I would have to try it out.
ReplyDeleteAlso, it must be a disaster with directional prints.
Well, I wouldn't call it a beginner pattern, but it's definitely not rocket science, either. I would recommend testing with some scraps first. (And you can see what happens if you try to construct the blocks like half-square triangles -- bad things!) I used some directionals in my quilt (see top picture), and I was pleased with the results.
DeleteThere are other ways to make HRTs. You can paper-piece HRTs (see http://www.13spools.com/2015/07/half-rectangle-triangles.html). You can also cut them into triangles first and then sew them together, but the method I use avoids sewing on the bias.
Your quilts are beautiful. I really appreciate that you took the time and effort (and it takes a lot of both) to write a detailed tutorial. I am bookmarking this page for future reference. Thank you so much!!!
ReplyDeletesewpreetiquilts.blogspot.com
This looks great! It's nice to see more patterns with Jolly Bars. I also love pre-cuts :)
ReplyDeleteI really love your quilt design it is amazing. Check this out for making your rectangles, makes it really easy. http://www.studio180design.net/videos/?id=19
ReplyDeleteI just love to use it.
Fun quilt, great tute!
ReplyDeleteI just came across this beauty. I'm new to half-square rectangles, and your tutorial is amazing. My first granddaughter is due in February, and my daughter loves modern quilts. Thank you so much!
ReplyDelete