
The problem with me and small projects is that I’m great at making them big projects. How is that possible? Quantity, my friends. Take, for instance, my current pin cushion streak ...
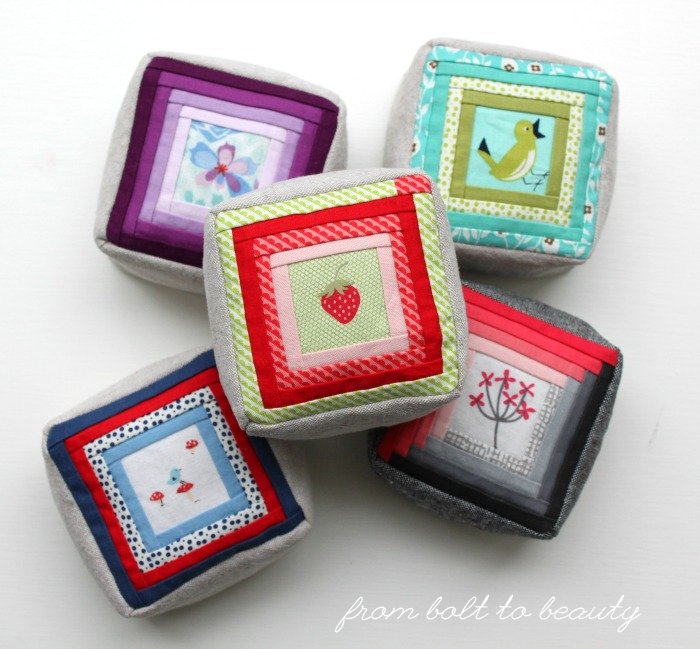
Aren’t they the cutest?! I bookmarked the tutorial, found on Mama Love Quilts, last summer, when it debuted. There’s something about the teeny-tiny log cabin blocks and chunky cube cushion that I find irresistible.
Once I had rooted through my scrap bin, dumping fabric of various sizes and colors all over my dining room floor, it seemed silly to stop at just one. To date, I’ve made eight, with plans for more.
I have a few thoughts if you want to whip up your own collection of cuties ...
1. The hardest part of making these pin cushions is finding a starting point. The center square finishes at 1¼ inch. I have few novelty prints. Of those I do have, many were too big to use in this project.
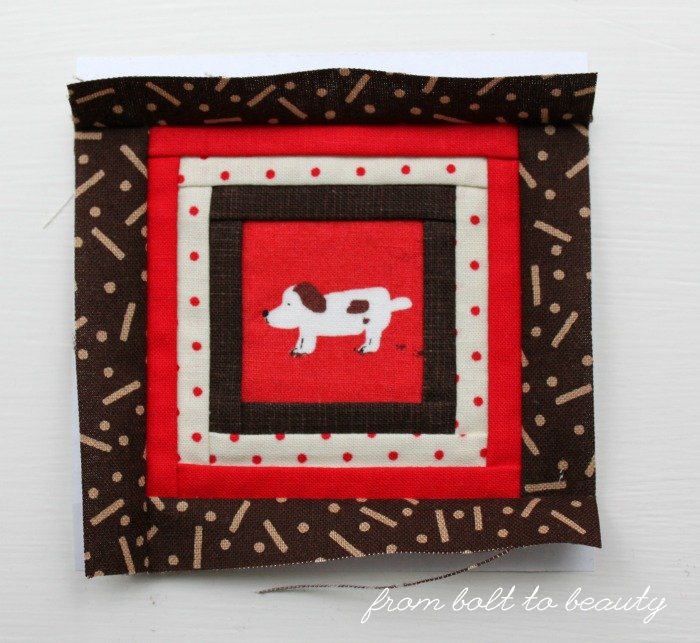 |
| I was happy that I saved this sweet pup, from Aneela Hoey’s Sherbet Pips collection. He was just the right size! |
2. The skinny logs in this work best with solids or super-small patterns. They finish at ¼ inch, and my attempts at using some less dense patterns, even though small, weren’t as successful.
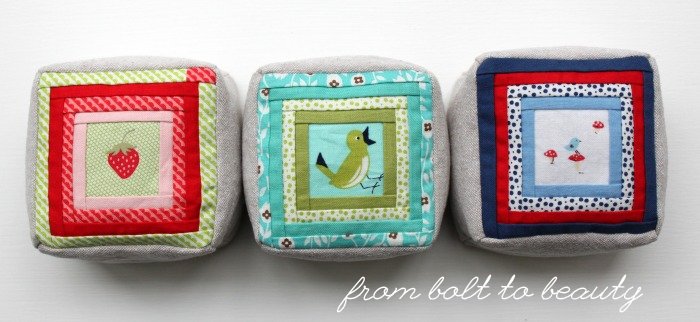 |
| These three pin cushions use some tiny Bonnie and Camille prints, which were perfect for the scale here. |
3. I tried some random combinations of fabrics, but I ended up preferring the structure of concentric squares or ombre gradations.
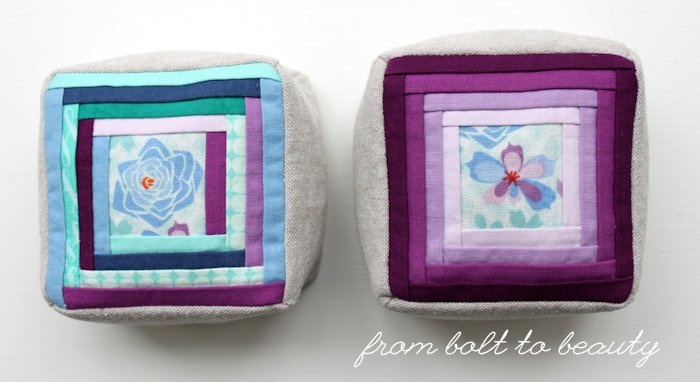 |
| The random version on the left is pretty, but the more orderly one on the right feels more “me.” |
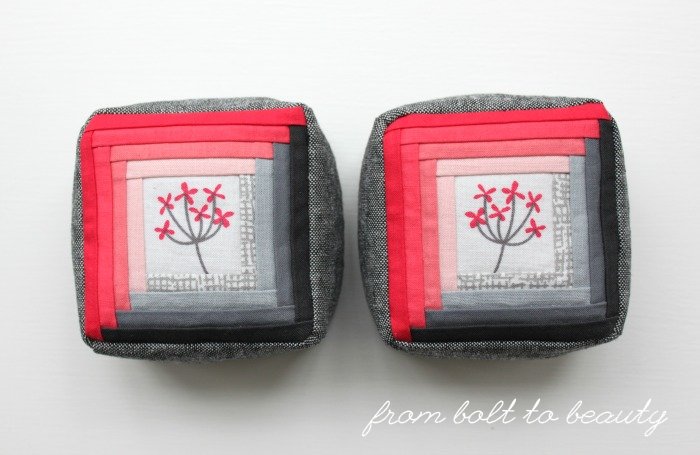 |
| I was so pleased with the gray and pink combination that I made two. |
4. Hand-stitching is a turn-off for me, and these pin cushions required a little bit. I consulted a tutorial from Meadow Mist Designs, and the hand-stitching ended up being fast and easy.
 |
| That’s my ladder stitch. Looking good! |
5. You may have heard others recommend using the crushed walnut bedding they’ve purchased at pet stores as an economical way to fill pin cushions. It does work! I bought a 5½ quart bag—marketed as lizard bedding—for $10. Each cushion required over 1½ cups of filling, so I used about half the bag with the eight pin cushions I’ve made to date. (Read that as: More are sure to follow!)
6. For those of you visiting from Scraptastic Tuesday ... My scrap strategy is to keep (and sort by color) any scraps that are 2½-inch squares or larger. These pin cushions had me rethinking that approach. After all, the centers finish at just 1¼ inch—think of how many pin cushions I could have created with scraps that I’ve tossed! My inner voice of reason prevailed, however: I only need so many pin cushions in my life. Sure, I was able to get most of this fabric from my scrap bin, but my current system is working—no need to complicate things by keeping smaller bits!
To make your own 3½-inch log cabin block and transform it into a pin cushion, see the tutorial at Mama Love Quilts.
Pssst ... Know of any other fun pin cushion tutorials? Let us know about them in the comments!
Linking up to Let’s Bee Social, Needle and Thread Thursday, Finish It Up Friday, and Scraptastic Tuesday ...

Thanks for the tip on the walnut bedding filling. Here was tutorial that I enjoyed. I used it as a skill builder to try a traditional cathedral window block. http://www.gogokim.com/2011/12/cathedral-window-pin-cushion-tutorial.html (here is how mine turned out: http://www.reddeliciouslife.com/2015/11/retreat-projects-roundup.html)
ReplyDeleteI also made this one too -- http://diaryofaquiltmaven.blogspot.com/2013/01/faux-cathedral-windows-pincushion.html
but I'll warn you, I don't recommend using fusible fleece on the underside of your finished "windows" (where you place the pins) - it's really hard to push the pins in!
those are so adorable! I love the pink and gray pair! I'm not sure this bird pincushion is quite as tiny as yours, but it is another cute pattern, an not terribly difficult. http://tinyurl.com/kq3yfzr
ReplyDeleteThese are so cute! :) I really like the square cushion.
ReplyDeleteI go on the same kind of streaks. If I like something and it is quick, why not make more? :) Do you put a lining in them? Or just a super tight stitch?
These are adorable!! I definitely need a new pincushion so this might just make it to my to-do list this weekend...we'll see. :D
ReplyDeleteVery cute pincushions. But such tiny piecing....yikes.
ReplyDeleteI am so glad to hear that pet store walnut shells does work! And your cushions...are killer cute. I love that little pattern! The grey and pink are my favorite, but I like the little doggy too! (it looks like he's doing his business...)
ReplyDeleteGorgeous pincushions!
ReplyDeleteThose are massively cute! I may have to try this. :)
ReplyDeleteLove these. I'm not a pin cushion maker, but I could see the design as part of a mini quilt or ornament. I'm especially intrigued by the pink/gray one. The flowers almost look like embroidery. Hmm, that would be interesting to do--or maybe a tiny thread painting? I've always enjoyed Amanda's pincushions on http://crazymomquilts.blogspot.com/. She has a tutorial for a mini patch as well as one for different type made with a tuna can. Both are under her "other tutorials" tab. But her whole blog is loaded with different ones.
ReplyDeleteLove, love, love! I use the walnut bedding, also, and won't go back. Did you know that pincusions made with ground walnut shells are generally heavy enough to use as pattern weights? I use them often for that purpose. Also, visit AmandaJean at Crazy Mom Quilts for lots of pincushion inspiration.
ReplyDeleteI love those gorgeous pin cushions! Thanks for linking up to #scraptastictuesday!
ReplyDeletevisiting from crazy mum quilts. These are amazing. I love pin cushions but have a problem with what to do with them all!!
ReplyDeleteThose are SO sweet! And so small! How do you press and sew all those little tiny seams? The foot on my sewing machine is pretty picky about the amount of space it needs to sew straight. And thanks for the tutorial links! One of the days...
ReplyDeleteYour pin cushions are so sweet! It does get crazy how we justify keeping the smallest of scraps, well done on putting these to great use!
ReplyDeleteThese are so sweet Michelle!
ReplyDeleteThey are cute, BUT I just don't get the fascination with pin cushions. It seems like a lot of sewing.
ReplyDeleteDo you use these pin cushions? Give them away? Or just display them in a basket?
These were the first pin cushions I ever made, and they've been given to friends. Pin cushions are a good project for giving -- small enough to sew en masse and something the recipients probably wouldn't make for themselves. That said, I didn't make one for myself! I already have a pin cushion, and it alone serves me just fine, keeping my hand-sewing needles consolidated in one spot. (Cheryl Brickey, of Meadow Mist Designs, made it for me: https://www.instagram.com/p/wwiZxTEXFL/?taken-by=frombolttobeauty)
DeleteI've been wanting to try this sweet scalloped pincushion (http://www.acraftyfox.net/tutorial/gingham-clamshells/ ) for a long time, but worried that it might be too large. I love these tiny versions you've sewn up!
ReplyDeleteI hadn't seen those before. I can commit to a clamshell pin cushion more easily than a clamshell quilt for sure!
DeleteThey are the cutest indeed!!
ReplyDeleteI have a pincushion that I like, it is handmade, and it was given to me by a fabric store, and I've been thinking to open it just to see what's inside ... Have you tried the steel wool filling; it's supposed to sharpen needles and pins.