A curious phenomenon occurred between piecing and quilting my color wheel mini: It became a throw.
I loved this project from the get-go and worked hard at fine-tuning the color transitions (see
here and
here). But once I realized what a 40-inch quilt would look like hanging from my bedroom wall, I had to regroup. There just isn’t anything mini about a quilt of that size.
I added to the length and height of the quilt easily enough. Then it was time to quilt. Sigh. Quilting never goes smoothly for me. I started by quilting along the wedges of the color wheel, extending each line to the edge of the quilt. Then I began echoing the border around the wheel. That’s when I saw puckering where those horizontal and vertical quilt lines intersected the lines radiating from the color wheel.
I went into problem-solving mode. I continued to quilt at breakneck speed, sure that the puckering problem would spontaneously resolve itself (which, of course, it didn’t), and then I went into problem-solving mode. I knew that the pressure on my presser foot was fairly light, a lesson I had learned the hard way on
another project, but I considered:
Was I basting adequately?
I spray my quilts all over (as opposed to Elizabeth Dackson’s approach of spraying every few inches, which I have since tried on another, yet-to-be-blogged-about quilt). I encountered some tutorials online that recommend setting basting spray with an iron. If that contributed to my problem, it was too late to fix it. I put that advice in my back pocket for another project and another day.
Was starting with diagonal quilting lines contributing to the problem?
My friend
Kim and I discussed whether I was inadvertently stretching the fabric by quilting lines on the bias before quilting lines on the cross grains of the fabric. It was something worth considering, but if I stretched the fabric, there was no recourse. Stretched fabric is stretched fabric. Again, it was a factor I’d keep in mind for future projects.
Was I missing an opportunity to flatten out the fabric on the fly?
Another friend,
Sarah, asked whether I wore gloves while quilting. I don’t—I consider them an accessory for free-motion quilting, not straight-line quilting. She showed me how she uses gloves to flatten problematic sections and avoid pin tucks like the ones I was experiencing. This was a technique I could try on this quilt, even at this stage.
In the end, I put the quilt in time-out for a few weeks. When I was ready to deal with it again, I ripped out a significant amount of the straight-line quilting outside of the color wheel itself (it’s worth mentioning that both Kim and Sarah cautioned me against this, but hey, I am a stubborn lady with perfectionist tendencies!). Then I started quilting again, this time working from the opposite direction I originally worked in, which meant I always had more quilt rolled up inside my sewing machine than I did hanging off of it. I also wore gloves and tried Sarah’s suggestion. It wasn’t easy to do with a spray-basted quilt; I had to loosen some sections to better manipulate the fabric. Together, however, these measures avoided any puckering. Woo hoo!
 |
| I was happy to use an Autumn Woods print, by Kate & Birdie, on the quilt top and binding. I used every bit of the yard I had on hand in this quilt. |
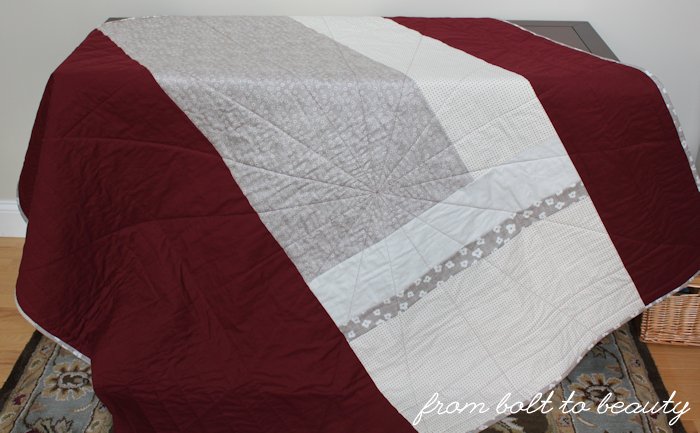 |
| This is a very me backing. I love how the two long swaths of Kona Brick frame the center patchwork. |
|
|
|
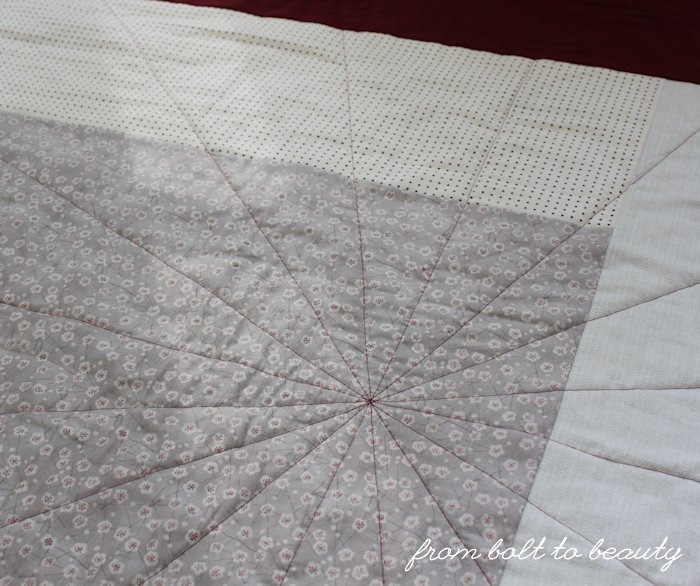 |
| I’m so pleased with how the quilting looks on the back, and I was happy to use that Edo Blossom print from Makower UK so prominently. Love it! |
This is my first finished quilt of 2015 and my first sizable quilting project in many months. What the heck have I been doing?! Minis. Bags. Quilt tops. Pretty much everything I could to avoid quilting. But I’m on a roll now! Expect a series of finished quilts over the next few months. : )
Linking up to
Sew Cute Tuesday,
Let’s Bee Social,
Needle and Thread Thursday,
TGIFF, and
Finish It Up Friday ...


